But what if the Finder suddenly stops showing your iPhone whenever you connect it? That can be a tricky situation if you want to transfer photos or take a backup on your Mac. If you are facing the same, check our solutions for iPhone not showing up in Finder on Mac.
1. Keep Your iPhone Unlocked
At times, if you’re iPhone is locked while you’re connecting it to the Mac, a successful connection may not happen. Make sure that you have unlock your iPhone first and connect it to your Mac. You should see your iPhone Home Screen and then plug your cable to connect it with your Mac. Once you do that, wait for a few seconds and see if your iPhone is showing up on Finder.
2. Change the USB Cable of Your iPhone
If you cannot see your iPhone model name listed in the Finder, the next step is to check the USB cable for connecting your iPhone to the Mac. If your current cable is damaged or is not Apple certified or not from a reputed brand, you should definitely get a new one. If you don’t want to repurchase the stock Apple cables, we would recommend getting a braided cable for your iPhone for better longevity.
3. Check the USB Port of Your Mac
While you are checking your cable, you should also check the USB port of your Mac and clean it. You can use a cotton bud or a small dental floss brush to remove the dirt and debris from the port. Then try reconnecting your iPhone to your Mac using that port.
4. Relaunch Finder on Your Mac
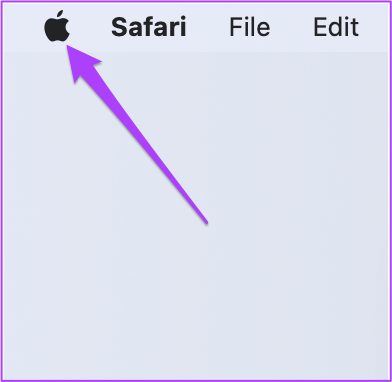
After checking the cable and USB port, if your iPhone is still not showing up, we recommend you to restart Finder on your Mac. This is just like how you Force Quit and Restart an app on your Mac whenever it stops properly. Let us give the Finder a fresh start by following these steps. Step 1: Make sure that you have connected your iPhone via the cable to your Mac. Step 2: Click the Apple icon at the top-left corner on your Mac’s Home Screen.
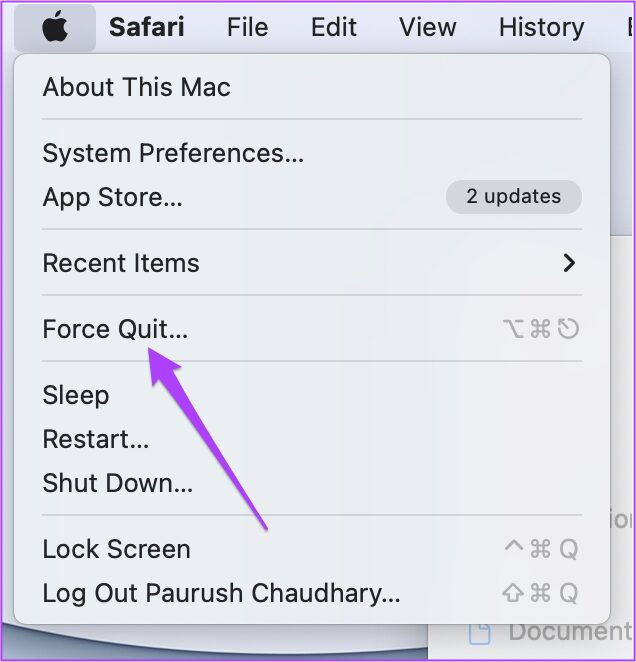
Step 3: Select Force Quit from the list of options.
Step 4: Click on Finder from the Force Quit window.
Step 5: Click on Relaunch.
Step 6: Click on Relaunch again to confirm your action.
Step 7: Open Finder and see if your iPhone is showing up or not.
5. Restart Your iPhone and Mac
If the previous step did not help you, let us move ahead and give your iPhone and Mac a fresh start. We would recommend restarting your iPhone and Mac by following these steps. It’s a good idea to disconnect the cable from your devices before performing this operation.
Restart iPhone
Step 1: Long press the Power Button and the Volume Up/Volume Down button on your iPhone. Step 2: Once you see the notification on your screen, swipe right to turn off your iPhone.
Step 3: Long press the Power Button to reboot your iPhone.
Restart Mac
Step 1: Click on the Apple icon at the top-left corner on your Mac’s Home Screen.
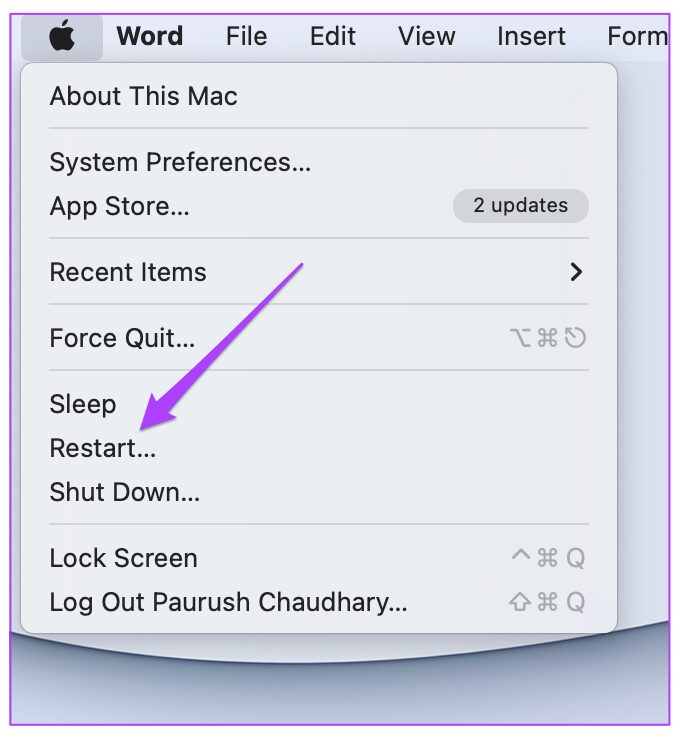
Step 2: Select Restart from the list of options.
After both your devices restart, connect them via the cable and see if your iPhone is showing up on Mac or not.
6. Check Finder Sidebar Preferences
We recommend is checking your Finder’s sidebar preferences. All your devices and folders appear in your Finder’s sidebar. Follow these steps to display your iPhone in Finder’s sidebar. Step 1: Press Command + Spacebar to open Spotlight Search, type Finder, and press Return.
Step 2: Click the Finder tab in the top-left corner.
Step 3: Select Preferences from the list of options.
Step 4: In the Finder Preferences window, click the Sidebar icon at the top.
Step 5: Check if all the items under Location are enabled.
Step 6: Close the window and reconnect your iPhone to see if it shows up in Finder on Mac.
In case your cannot see your Finder’s sidebar, check out our post on how to fix Sidebar missing on Finder.
7. Reset Trusted Computers List on iPhone
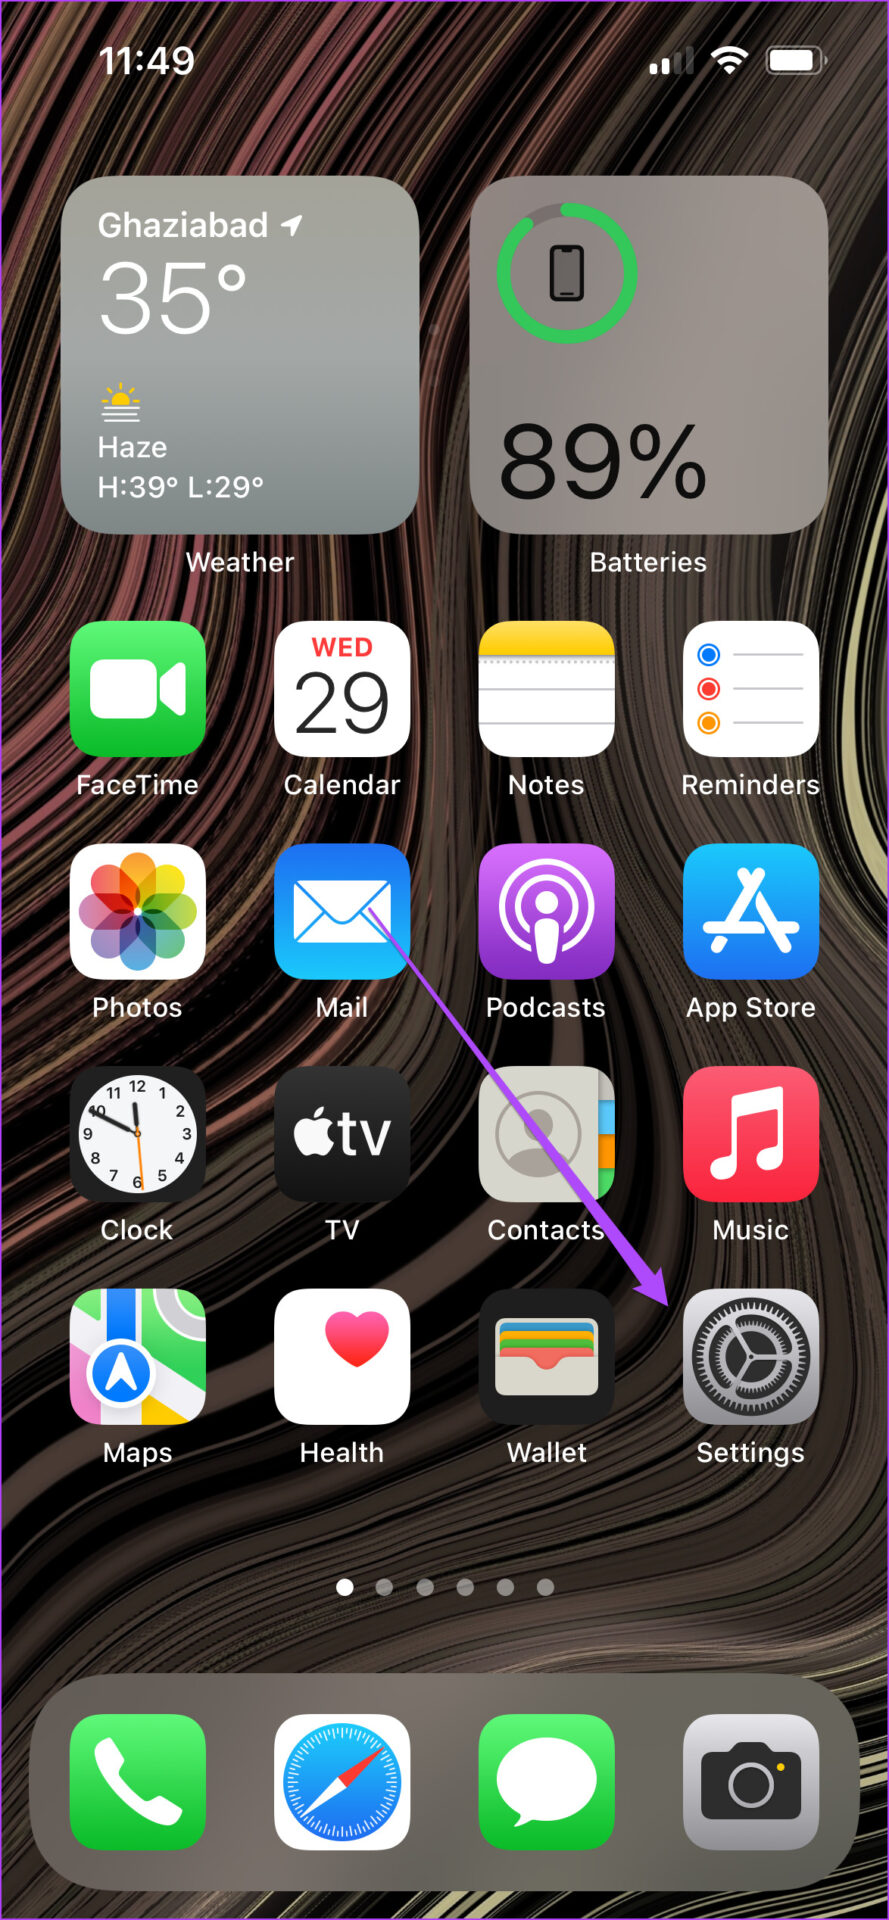
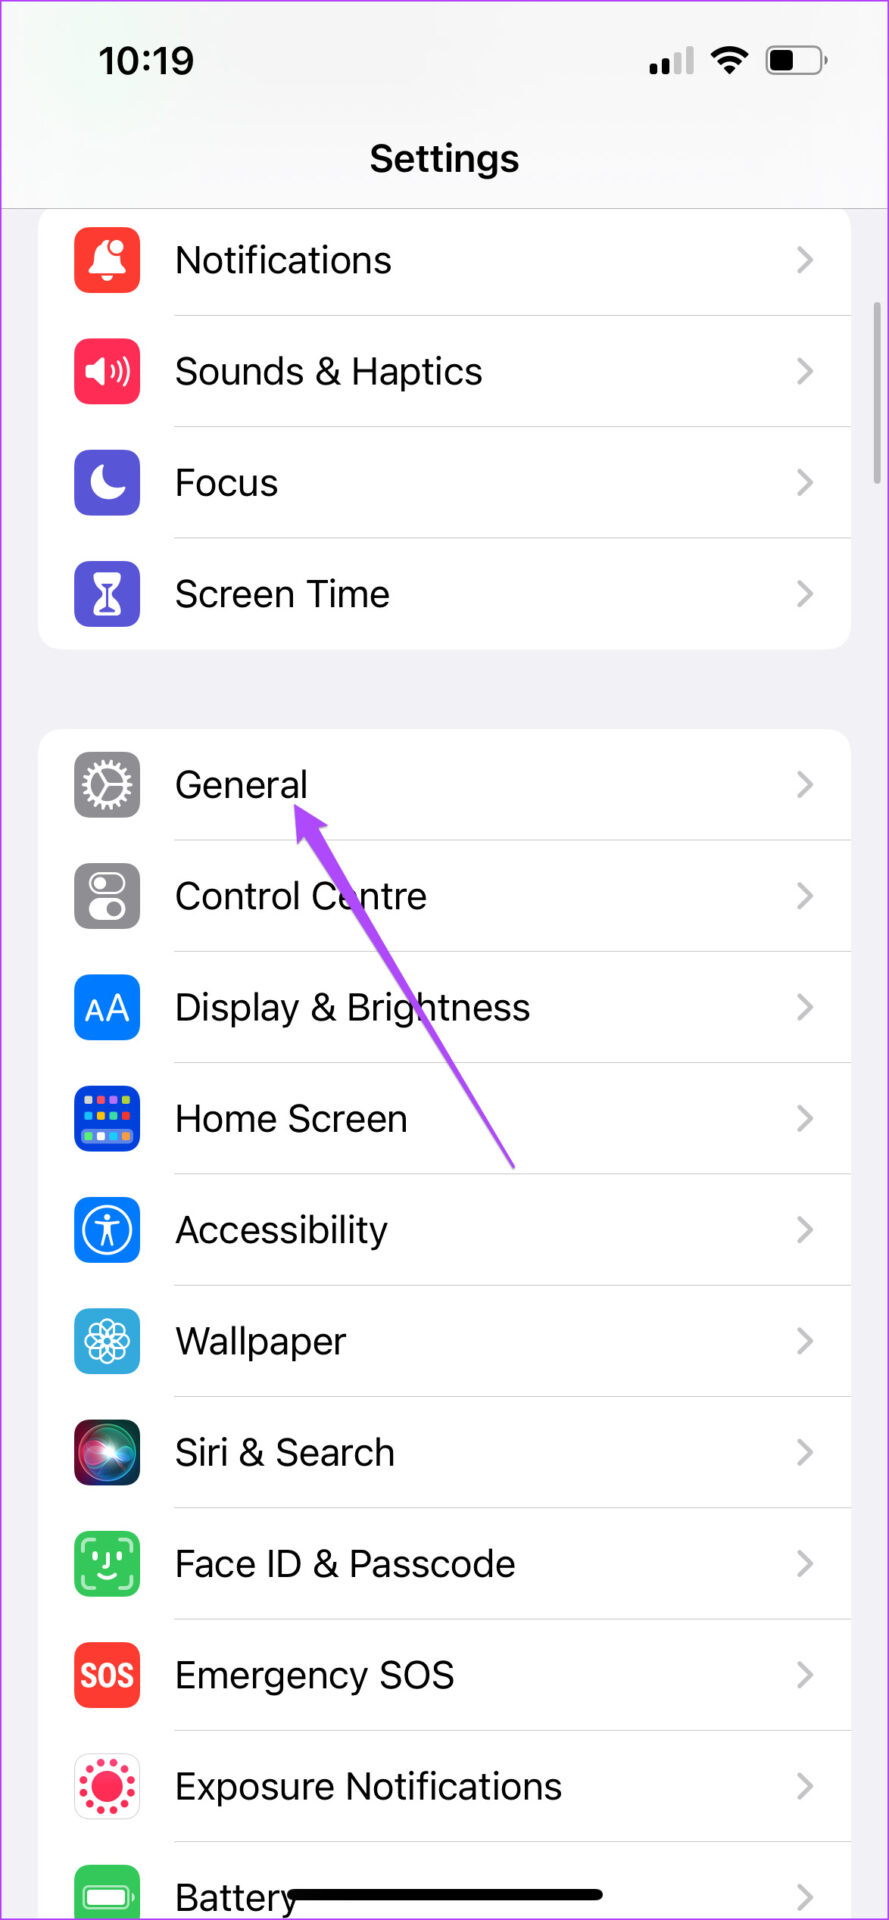
When you connect your iPhone with your Mac for the first time, a small notification pops up on your iPhone’s Home Screen. You are prompted to Trust This Computer to let the Mac access your iPhone’s data. To fix this problem, you can try resetting the Trusted Computers list on your iPhone. Follow these steps. Step 1: Disconnect iPhone from your Mac. Step 2: Open Settings on your iPhone.
Step 3: Scroll down a bit and tap on General.
Step 4: Scroll all the way down and select Transfer or Reset iPhone.
Step 5: Tap on Reset at the bottom.
Step 6: From the list of options that appears on your screen, tap on Reset Location and Privacy.
You might be asked to enter your iPhone’s passcode.
Step 6: Tap on Reset Settings to confirm your action.
Step 7: Close the Settings app and connect your iPhone with your Mac. Step 8: Tap on Trust under the Trust This Computer notification.
Step 9: Enter your iPhone’s passcode. Then check if your iPhone shows up in the Finder or not.
8. Delete Finder Preference Files From Your Mac
Just like other applications on your Mac, the Finder also create a Preference File to save information like folder locations and file names. If your iPhone is still not showing up in Finder, it could be possible that the Preference File of the Finder has corrupted. You can fix that by following these steps. Step 1: Launch the Finder app. Click the Go option in the Menu bar at the top left.
Step 2: Select Go to Folder option from the dropdown menu.
Step 3: In the search box that appears on your screen, type ~/Library.
Step 4: Click the first search result.
Step 5: In the Library window, click on the Preferences folder.
Step 6: After opening the folder, type com.apple.Finder.plist in the search box at the top-right corner and press Return.
Step 8: Select the search result and save a copy of it on the Desktop.
Step 9: Drag the folder to the Recycle Bin. Then open the Recycle Bin and click on Empty.
Step 10: Relaunch Finder and connect your iPhone to see if it appears there.
9. Check USB Device Tree in System Report
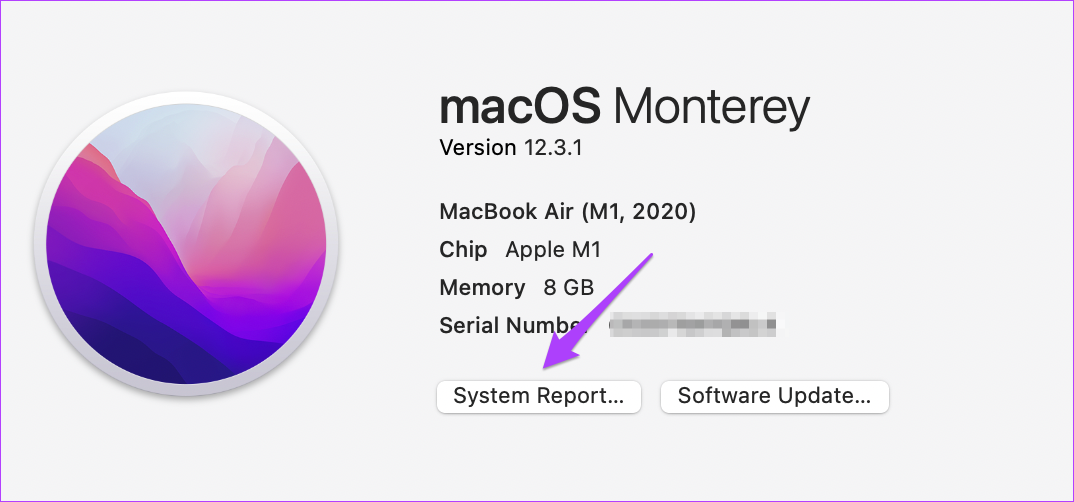
If you are still not seeing your iPhone in Finder on your Mac, chances are that your Mac’s USB port is damaged. You can check the same in your Mac’s System Report. Follow these steps. Step 1: Click the Apple icon at the top-left corner and select About This Mac.
Step 2: Click on System Report.
Step 3: Look for the USB option in the left menu.
Step 4: Check if your iPhone information like Product ID and Vendor ID are listed.
10. Visit Your Nearest Apple Store
If you could not see your iPhone information by following the previous step, it means that there is some internal issue with the USB port of your Mac. We suggest you visit your nearest Apple Store or Authorized Service Center to get it fixed by the experts.
Access Your iPhone Data With Mac
These steps will help you to troubleshoot and get rid of the problem. But we would also recommend you keep your iPhone data backed up using cloud storage like iCloud or Google Drive.
