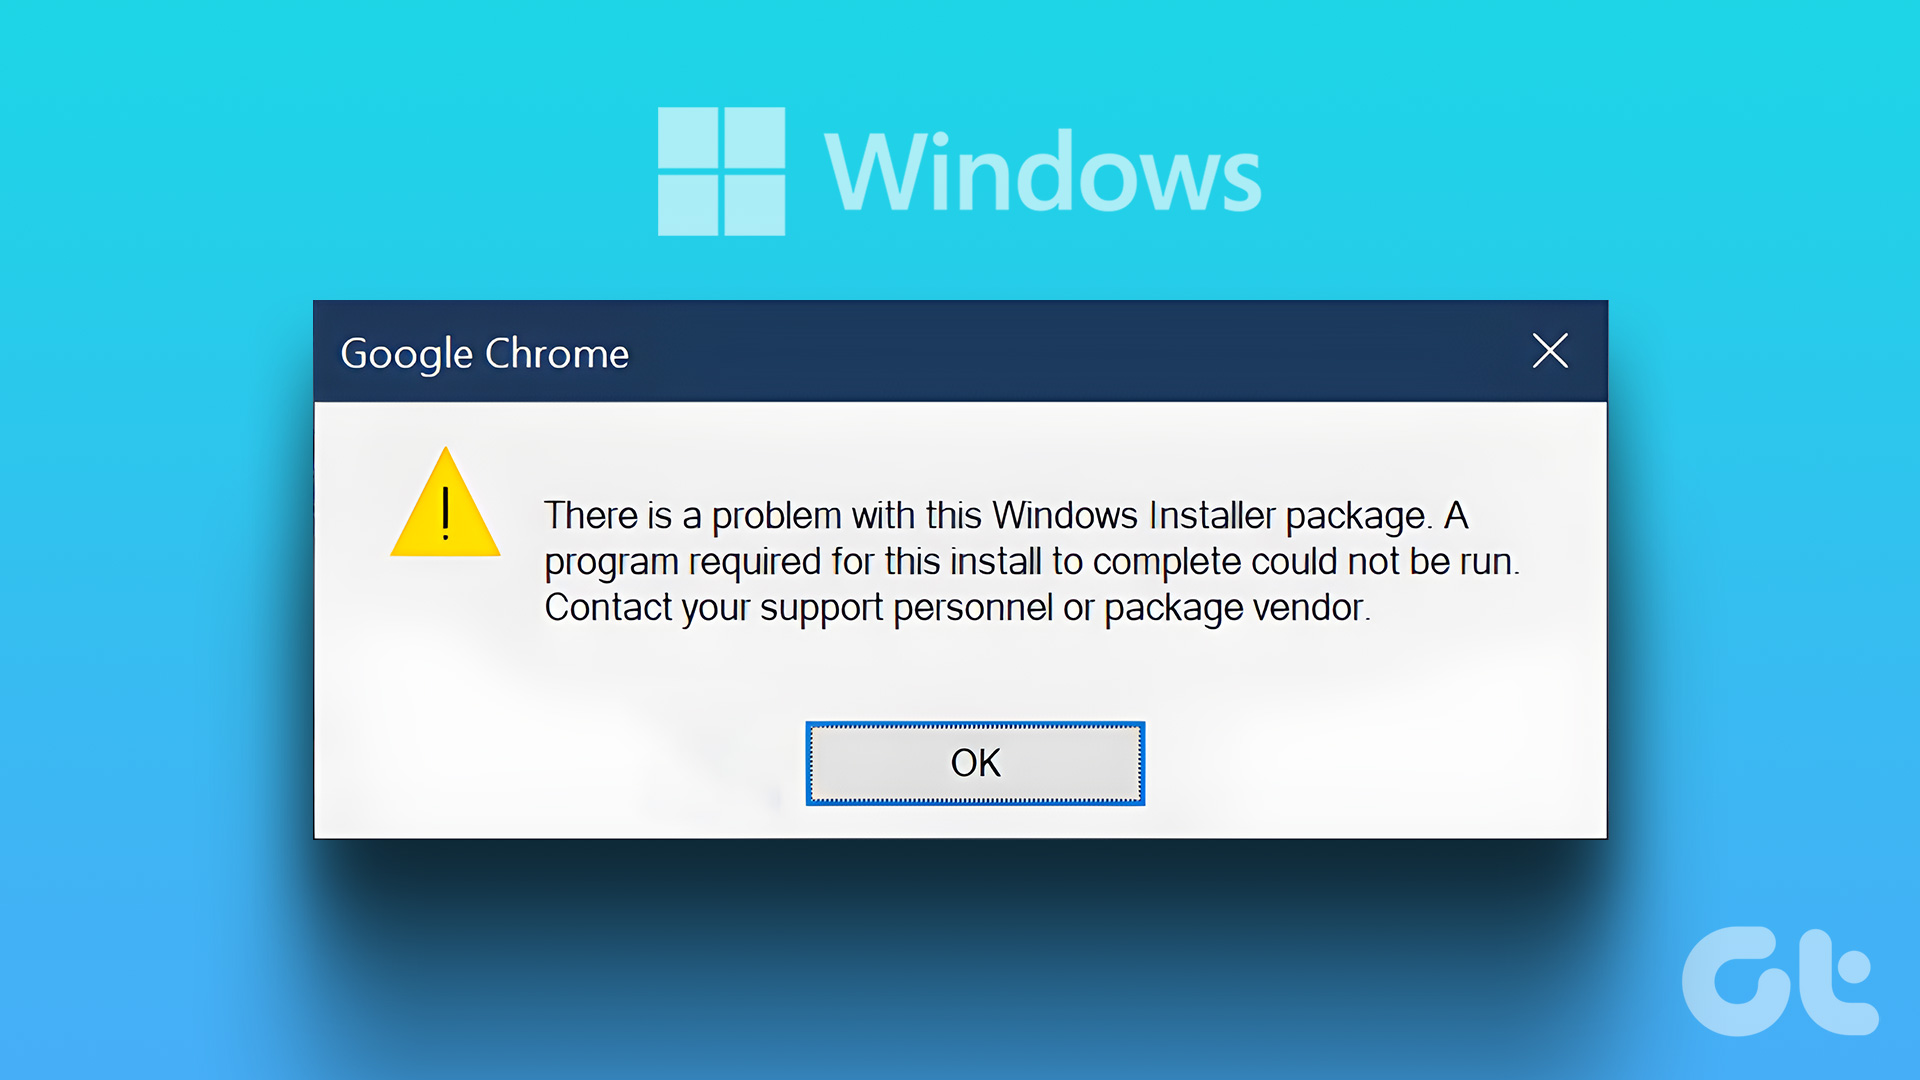
Before we move on to the fixes, it is crucial to understand the causes of the ‘There is a problem with this Windows installer package’ error. Well, there are a couple of reasons, such as outdated or damaged installer files and downloading the wrong package. Don’t worry, though. If you’re seeing this error, just follow the below fixes.
1. Run the File as an Administrator
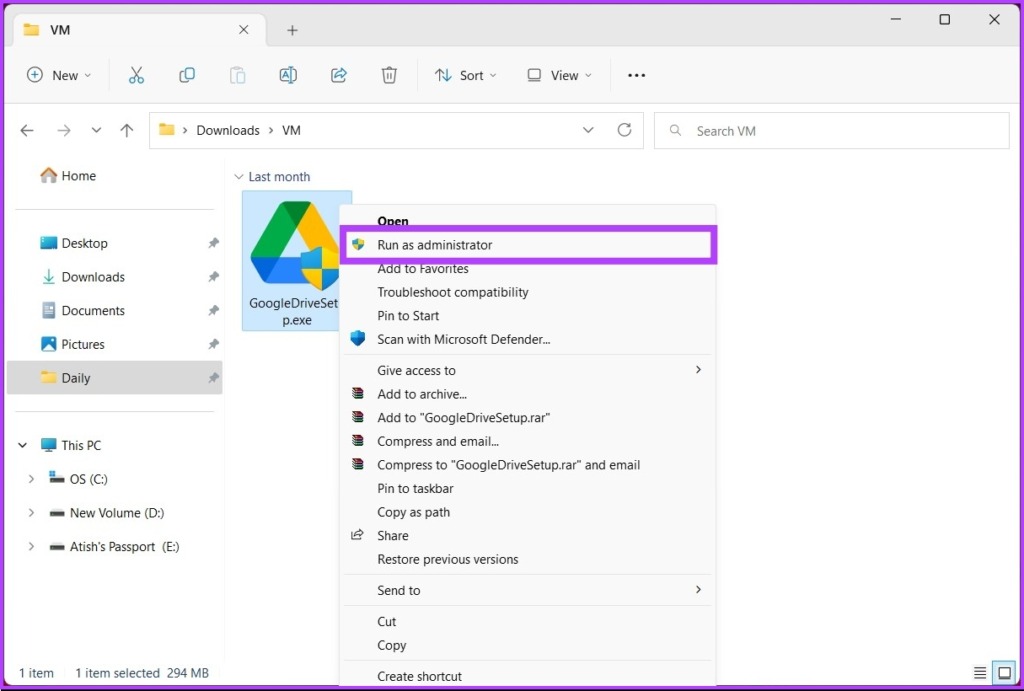
Permissions are crucial when installing a program or an application on Windows. You may be dealt with a Windows Installer Package error if you don’t have sufficient permissions. Follow the below-mentioned steps to execute the files as an administrator. Note: If you’re using a computer at work, you’ll need to get the installation done by the administrator or follow the steps. Step 1: Right-click on the software file you wish to install, and from the context menu, select ‘Run as administrator.’
Step 2: Click Yes to proceed in the User Account Control prompt. The installation should start smoothly, and the software should be set up quickly. If you are still facing the issue, check out the next method.
2. Repair the Software to Fix Windows Installer Package Error
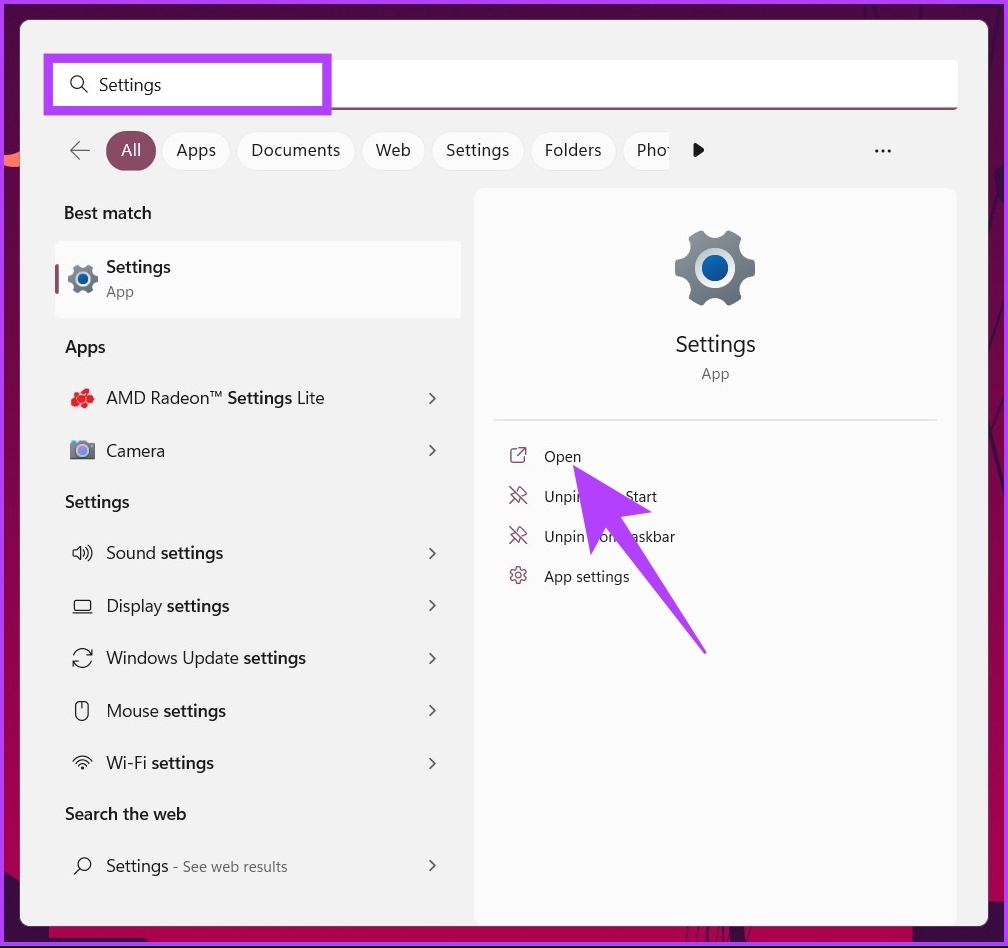
Sometimes, the application you are trying to install could be corrupt, which blocks you from installing it onto your Windows PC. In this case, you can repair the app using the Windows repair tool. Follow the steps below. Step 1: Press the Windows key on your keyboard, type Settings, and click Open.
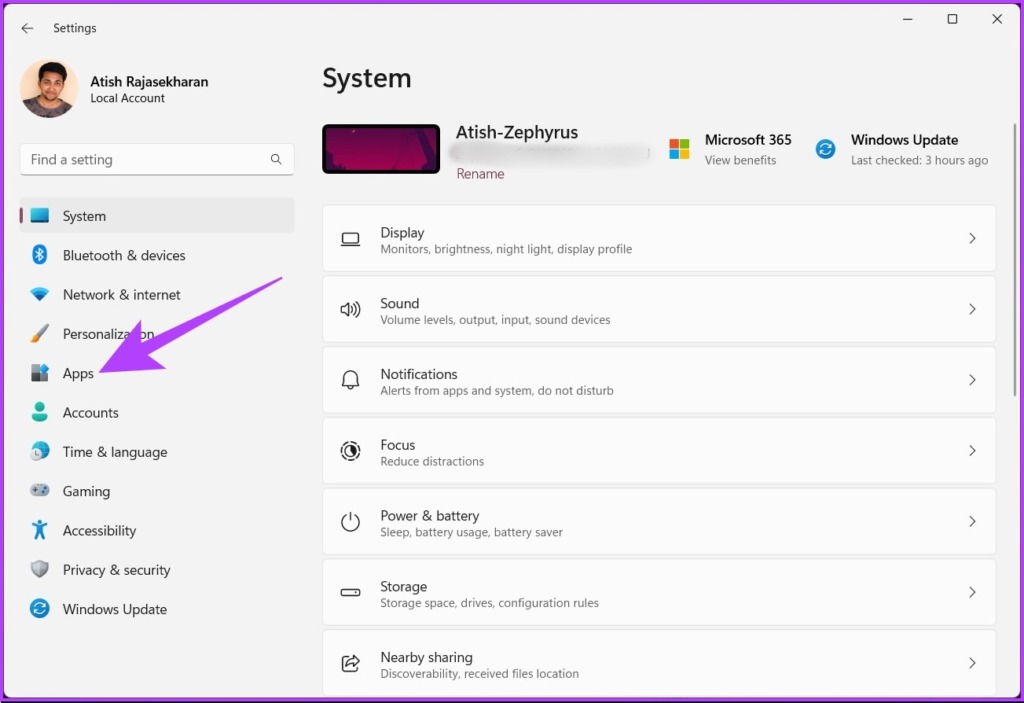
Step 2: Go to the Apps from the left pane.
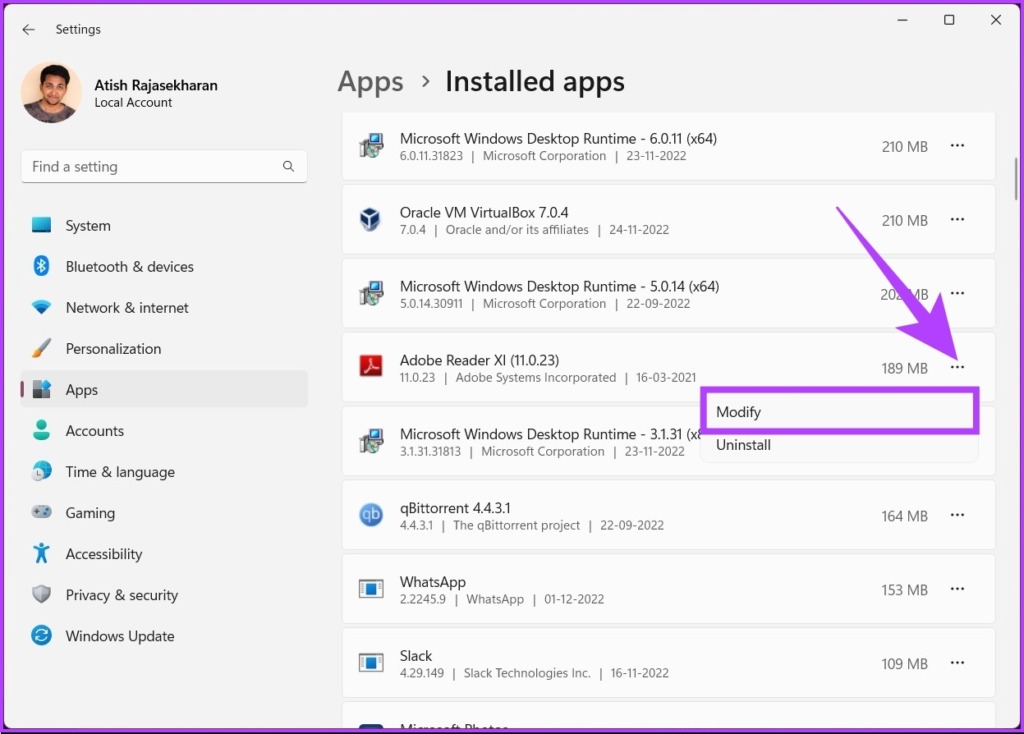
Step 3: Now, scroll down to find the faulty app from the list, click on the three dots, and select Modify in the context menu.
Step 4: Choose the Repair option and follow the on-screen instructions to repair the application.
That’s about it. You should now be able to install the applications hassle-free. If you are still unable to do it, move on to the next method.
3. Restart Your PC
Windows has a lot of minute processes and programs that work behind the scenes to run the Windows operating system smoothly. However, these processes or programs sometimes don’t function well, which causes a glitch within the system and leads to Windows functioning irregularly.
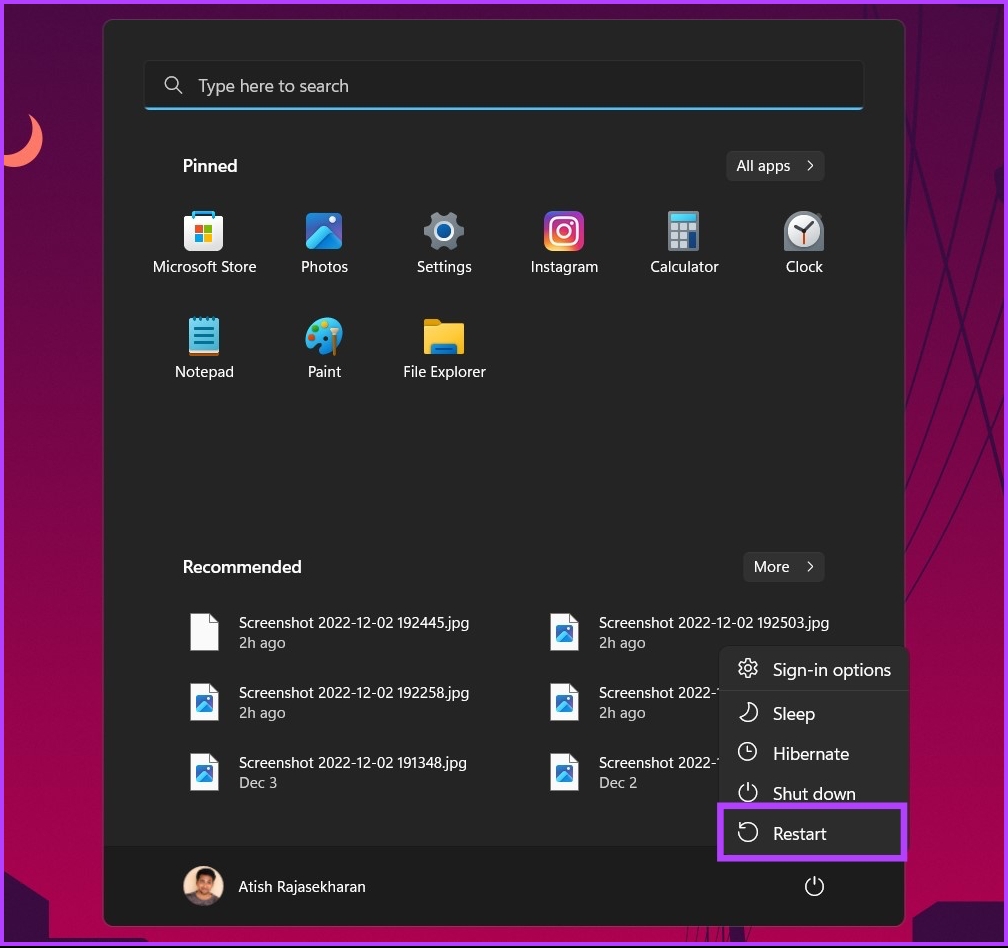
Most of the issues are minor and get resolved by rebooting the Windows system. Once the system opens after rebooting, you can try installing the software again, and for the most part, you should be good to go. If you are still facing the issue, jump to the following method.
2. Update Windows
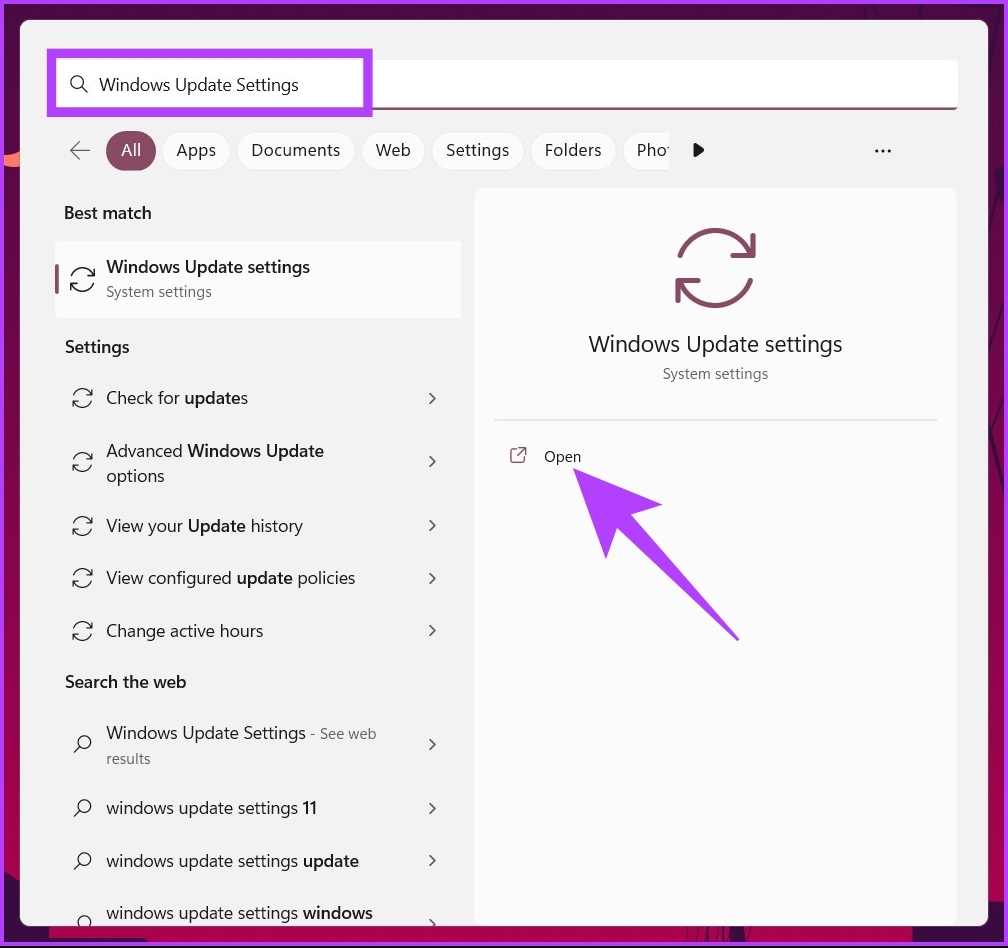
If restarting your system doesn’t work, try updating your Windows PC. An outdated version of the operating system can cause incompatibility and prevent you from installing or updating applications. Follow the steps below: Step 1: Press the Windows key on your keyboard, type ‘Windows Update Settings,’ and click Open. Note: Alternatively, you can go to the Windows Settings app and click on Windows Update to open the update settings.
Step 2: Finally, click on ‘Check for updates.’
Once the updates come up, click on Download, and that’s it. Once the PC returns after a reboot, try installing the program again. If it doesn’t work, the next method may help you.
4. Use Program Install and Uninstall Troubleshooter
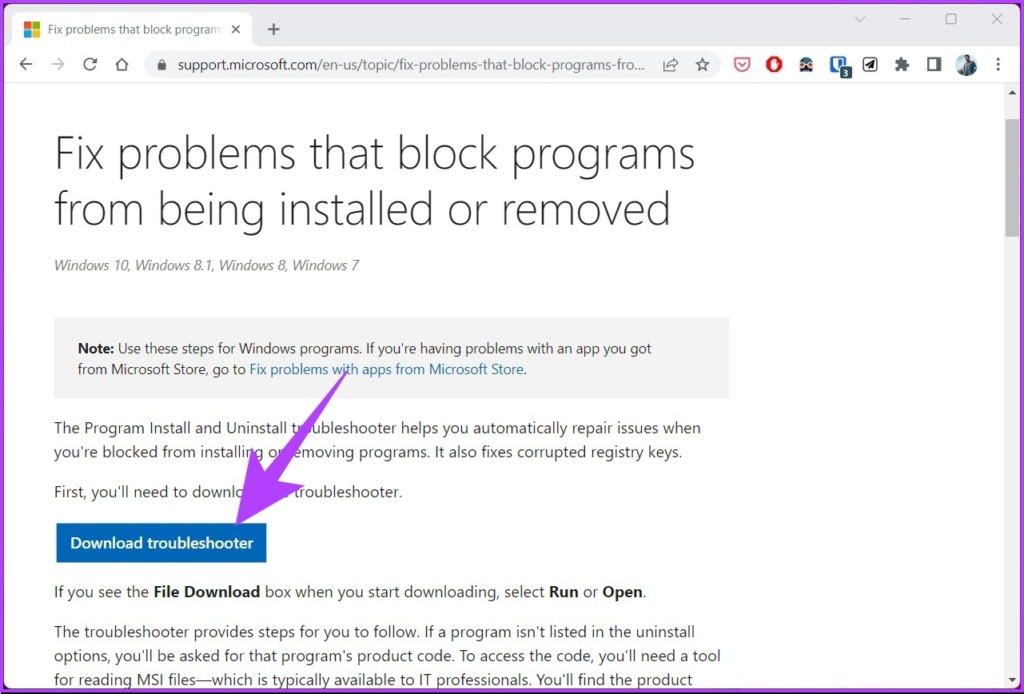
Microsoft has a troubleshooter called Program Install and Uninstall that you can use to fix problems with installing or removing programs from your Windows PC. Follow the steps below; Step 1: Go to the Program Install and Uninstall Troubleshooter Download page using the below link and click on Download troubleshooter. Download Microsoft Install and Uninstall Troubleshooter
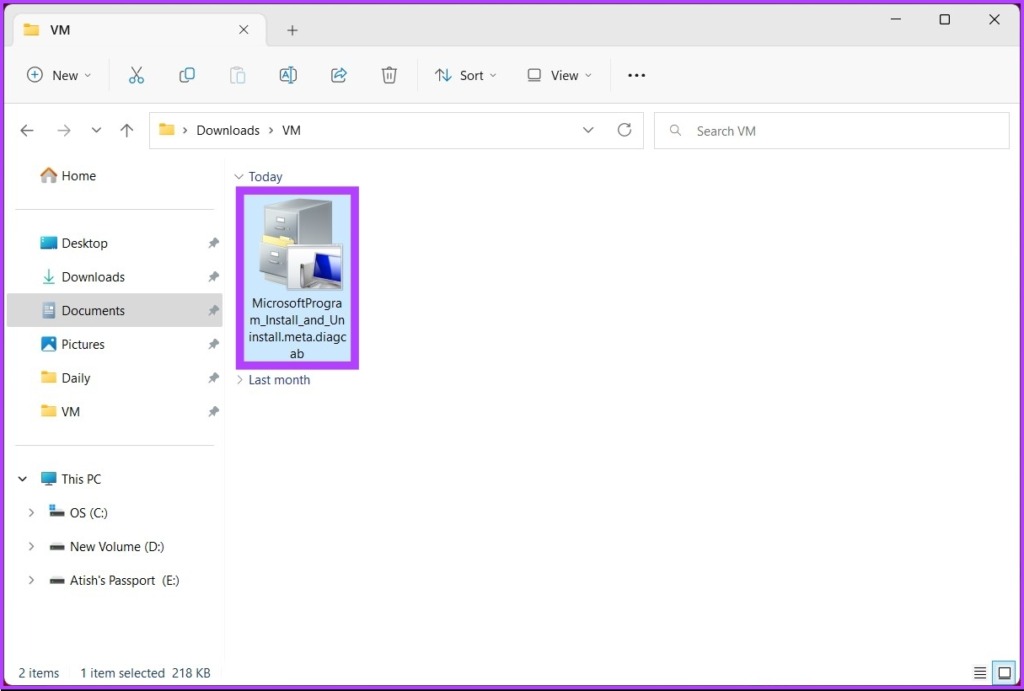
Step 2: Once downloaded, click on the downloaded file to open and install it.
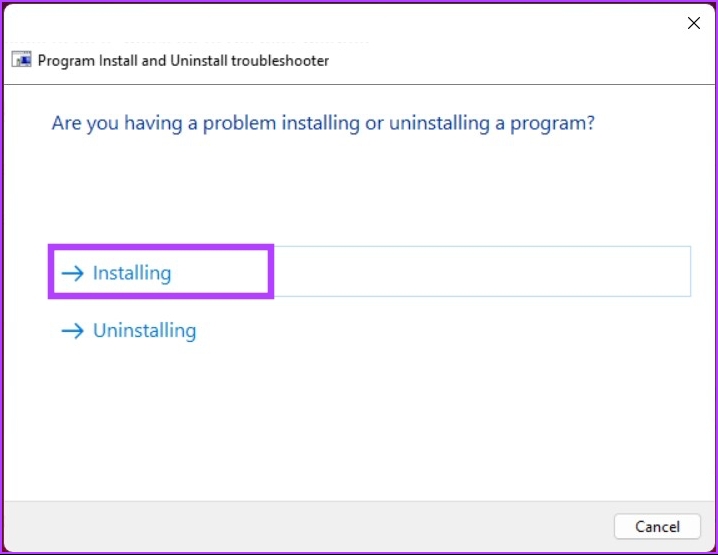
Step 3: Follow the installation instructions. When it asks you to choose whether you are facing an issue with installing or uninstalling the software, choose Installing.
Step 4: On the next screen, choose the application you are having issues with. If you cannot find it, click on Not Listed and Next.
With this, the troubleshooter scans the system and Registry for issues related to installation errors. If it finds something, it will suggest fixes. All you need to do is click on ‘Apply this fix’ to proceed, and you will be good to go. However, if the troubleshooter cannot identify the problem, check out the next method.
5. Update Windows
If the above fixes fail to work, try updating your Windows PC. An outdated version of the operating system can cause incompatibility and prevent you from installing or updating applications. Follow the steps below: Step 1: Press the Windows key on your keyboard, type ‘Windows Update Settings,’ and click Open. Note: Alternatively, you can go to the Windows Settings app and click on Windows Update to open the update settings.
Step 2: Finally, click on ‘Check for updates.’
Once you see the updates, click on Download, and that’s it. Once the PC returns after a reboot, try installing the program again. If it doesn’t work, the next method should help you.
6. Re-register Windows Installer
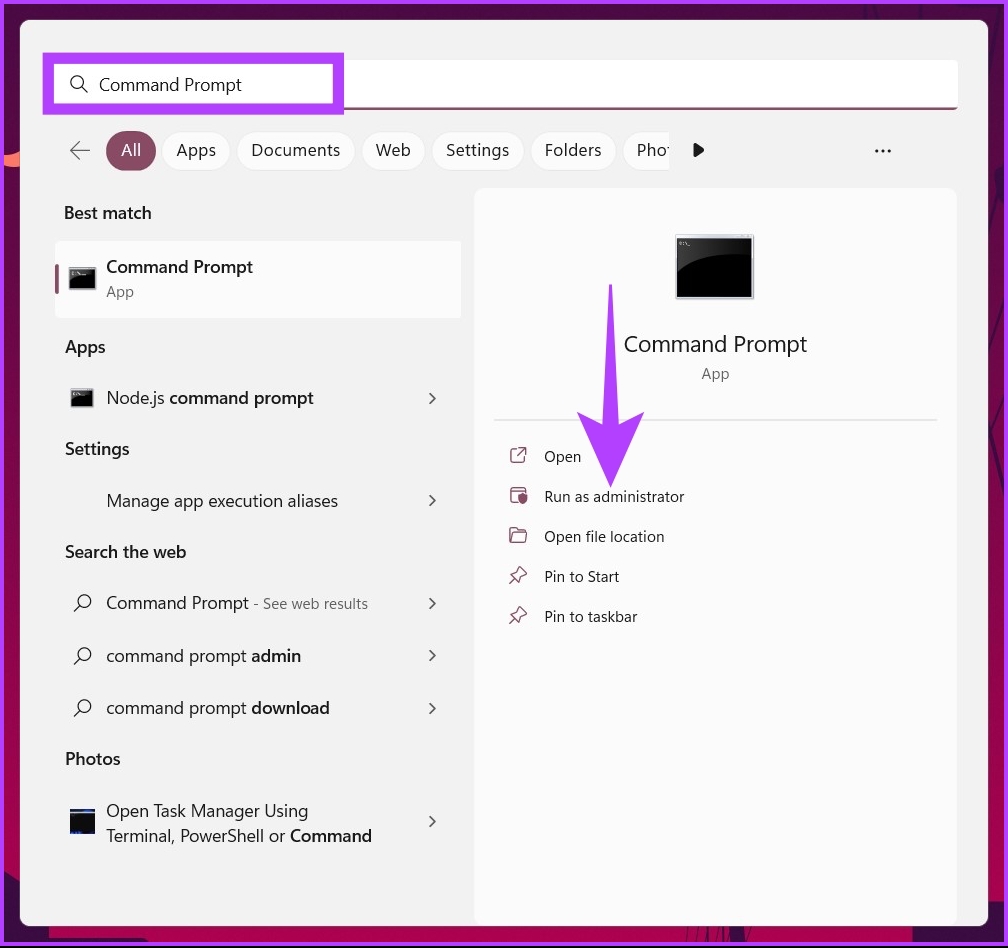
Sometimes, it is the installer that doesn’t run properly. However, you cannot repair or uninstall the installer like an app. So, you will have to use the command prompt to re-register it and fix related issues. Follow along. Step 1: Press the Windows key on your keyboard, type Command Prompt and click ‘Run as administrator.’
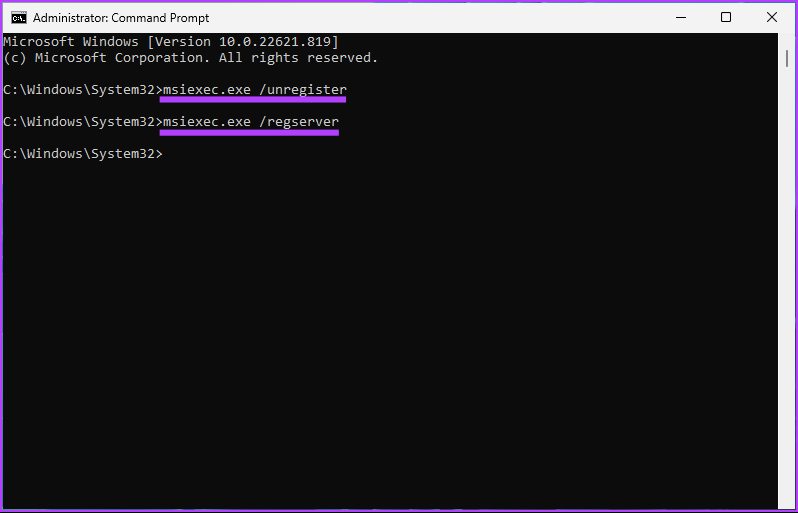
In the prompt, click Yes. Step 2: Type the below command and press Enter.
That’s it. Go back and try installing the application. You should be able to get through. If not, jump onto the last resort.
7. Restart the Windows Installer Service
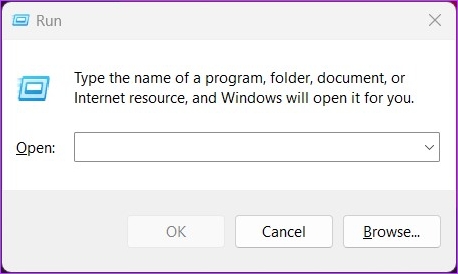
As it sounds, Windows Installer service is the underlying support for the Windows Installer Package to function well. However, due to some unlikely circumstances, sometimes the Windows Installer service stops or doesn’t work as expected, leading to an Installation error. Hence, restarting the Windows Installer Service helps sort the issue out. Follow the below-mentioned steps. Step 1: Press the ‘Windows key + R’ to open the Run command window.
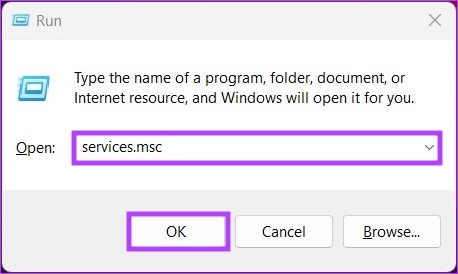
Step 2: Type the below command in the textbox and press Enter.
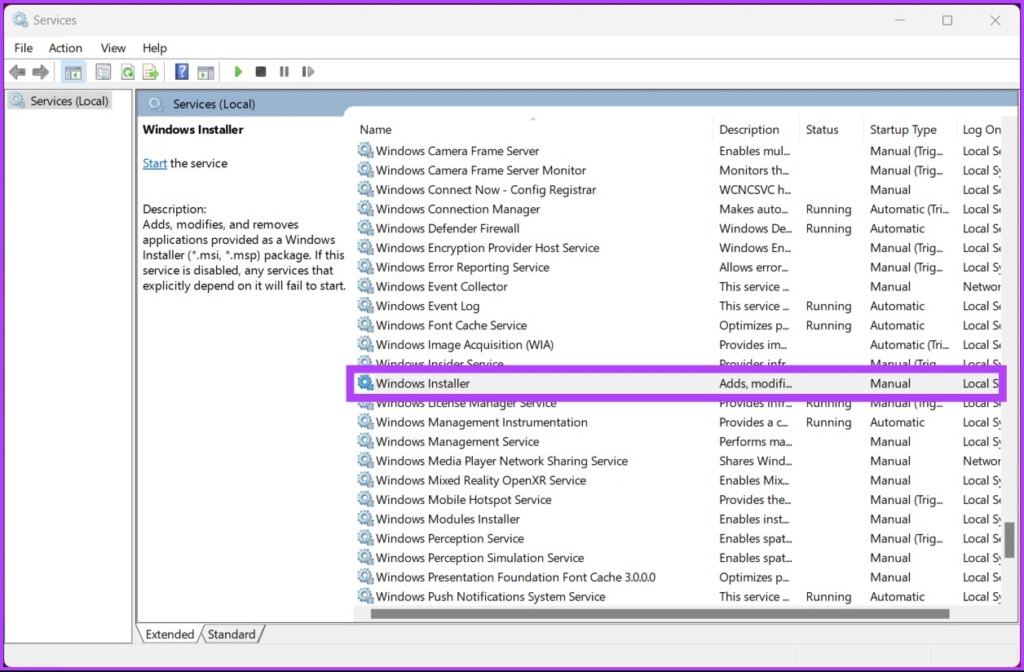
Step 3: Navigate to Windows Installer service.
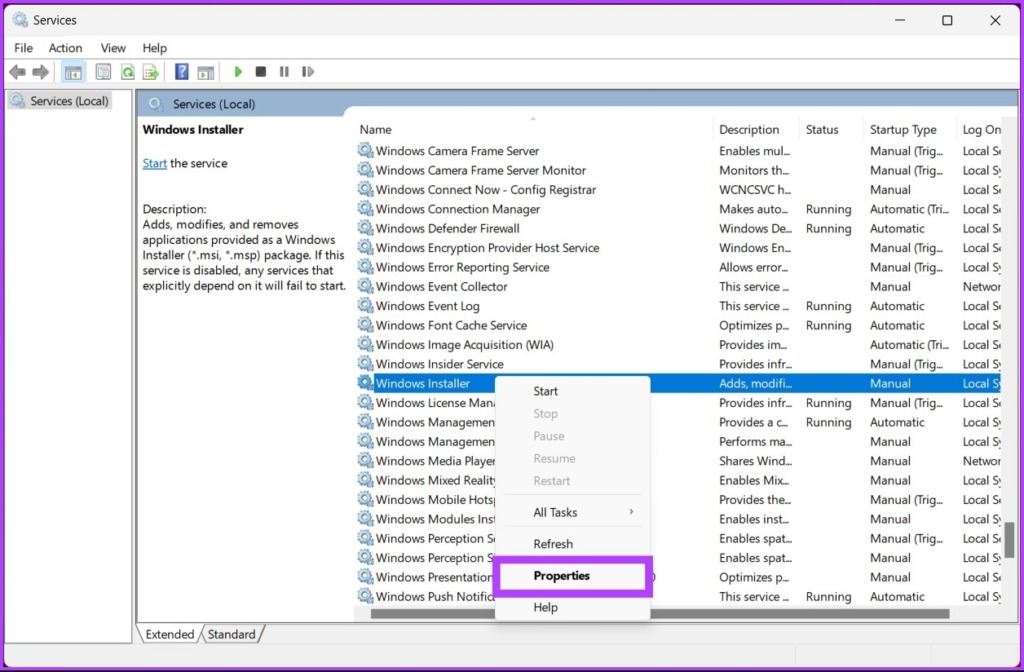
Step 4: Right-click on the Windows Installer service and choose properties from the context menu.
Step 5: From the Windows Installer Properties (Local Computer) window, go to the General tab and click on Stop.
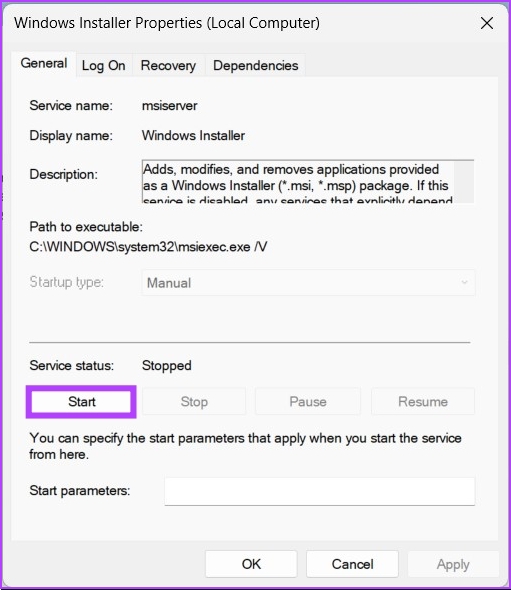
Step 6: Wait for a few seconds and click on the Start button. Note: Additionally, you can also click on the Startup type from the drop-down, and select Automatic.
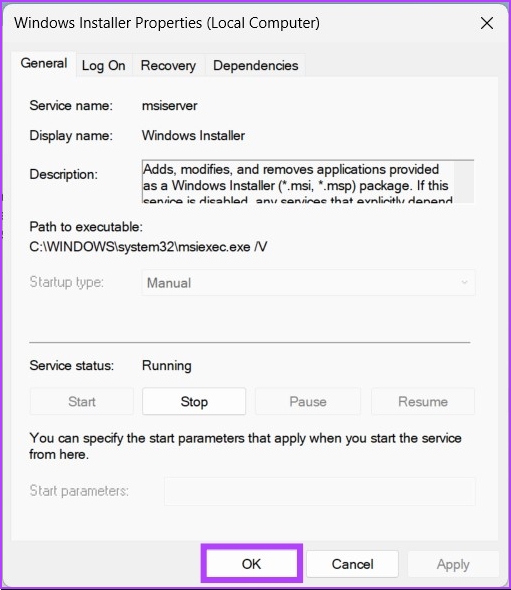
Step 7: Click OK to save the changes.
Install and Uninstall Effectively
If not all of them, at least some of the above ways will work to install the program you want on your Windows PC without any problems. We hope the above guide helped fix the Windows Installer Package error on your PC.
