However, it’s not perfect, especially when sharing photos. You can try some workarounds to send photos in full resolution, but that involves additional steps. WhatsApp gives an option to change the photo upload quality in the app. Here’s how you can change the setting on your phone.
What Is WhatsApp Photo Upload Quality
Whenever you send a photo to someone on WhatsApp, some amount of compression takes place. You can estimate the compression level by choosing the desired photo upload quality.
If you have a good internet connection, you can choose to send high-quality images all the time. However, if you use mobile data, you may want to tone down the quality of photos to save bandwidth and send images faster. This option to set the default photo quality on WhatsApp is present on both the Android and iOS versions of the app.
How to Change WhatsApp Photo Upload Quality on Android
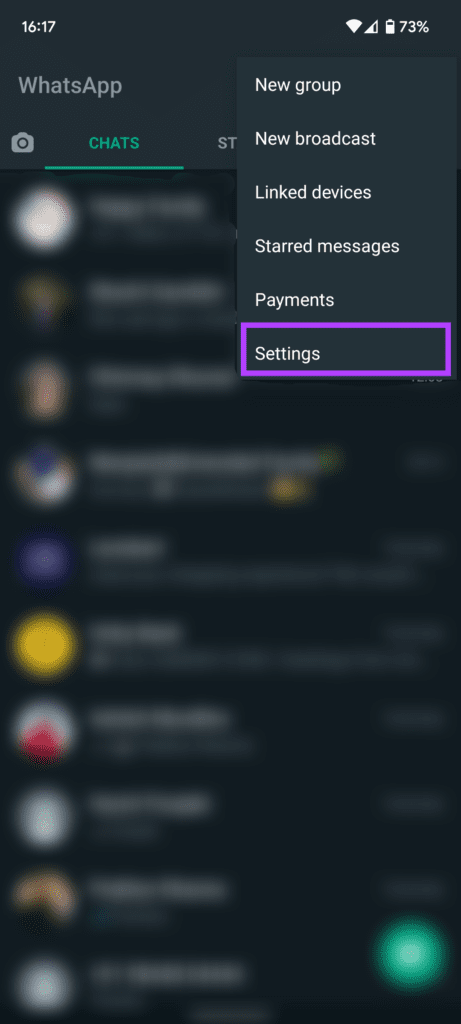
If you have an Android smartphone, here’s how you can change your photo upload quality on WhatsApp. Step 1: Open WhatsApp on your Android smartphone. Tap on the three-dot menu on the top-right corner of the app.
Step 2: Select Settings.
Step 3: Now, tap on Storage and data.
Step 4: The last section on the screen is ‘Media upload quality.’ The photo upload quality is set to Auto (recommended) by default.
Step 5: Tap on Photo upload quality and choose the option relevant to you. if you always want to send high-quality photos, select Best quality. If you have limited connectivity or a metered connection, select Data saver.
Step 6: Tap on OK. If you want your phone to automatically decide the quality of photos to send based on your internet connectivity, you can leave the setting on Auto. Note that this still doesn’t ensure that WhatsApp will share your without losing quality. To send a full-resolution image, you can attach it as a document on Android.
How to Change WhatsApp Photo Upload Quality on iPhone
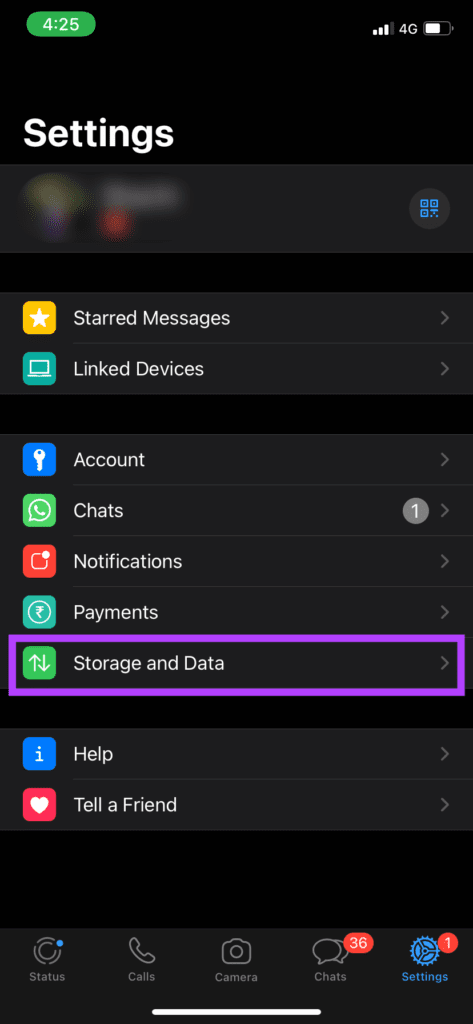
If use WhatsApp on an iPhone, here’s how you can change the photo upload quality setting. Step 1: Open WhatsApp on your iPhone. Navigate to the Settings tab at the bottom-right of the screen.
Step 2: Tap on Storage and Data.
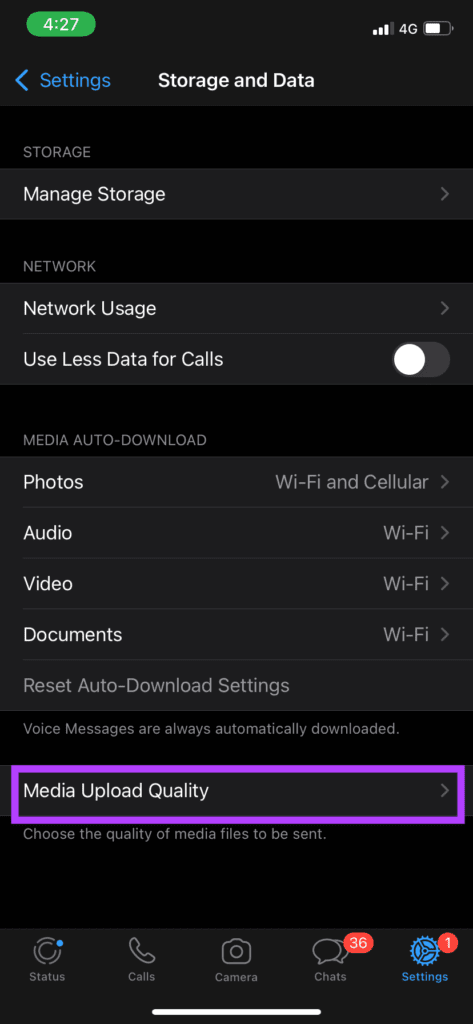
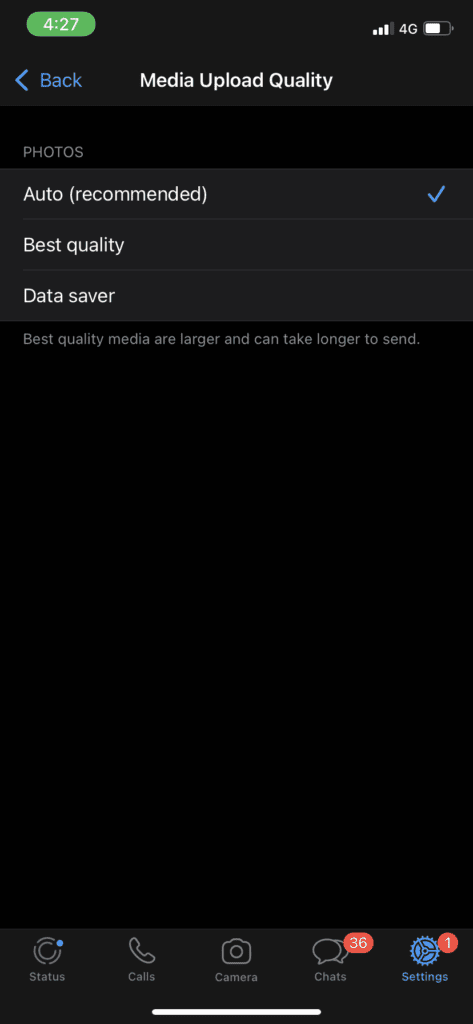
Step 3: Select the Media Upload Quality option at the bottom of the page.
Step 4: Auto (recommended) is the default selection. Change the option to whatever you prefer. Best quality has the least amount of compression, but demands more bandwidth. Data saver is best for when you’re low on data or in an area with weak connectivity.
Now that you’ve changed the image upload quality on WhatsApp, your photos will be sent with minimal compression. However, if you still want to send photos with no loss in quality, you can send them as files. Here’s how you can do it.
How to Send Photos as Files on iPhone
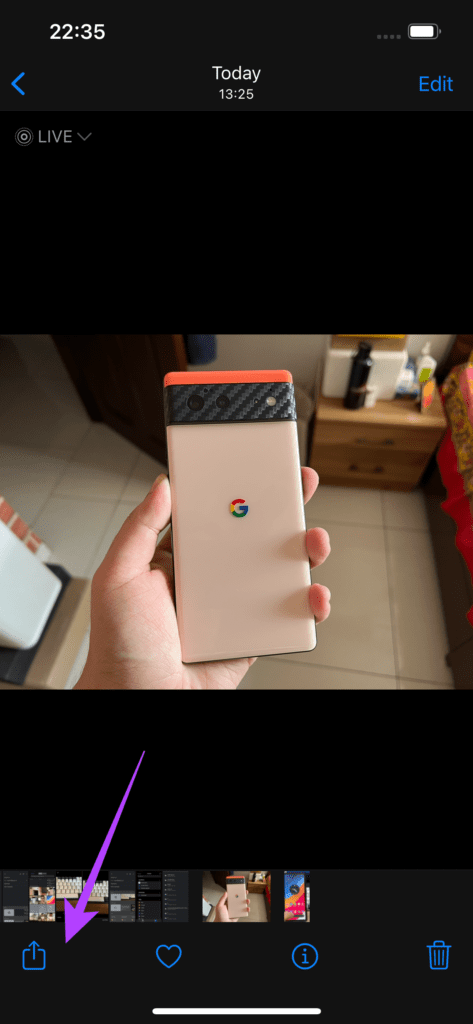
Saving a photo to the Files app and then sending it via WhatsApp results in a much better quality of images. Step 1: Open the picture you want to send in the Photos app on your iPhone.
Step 2: Tap on the Share icon on the bottom-left corner of the screen.
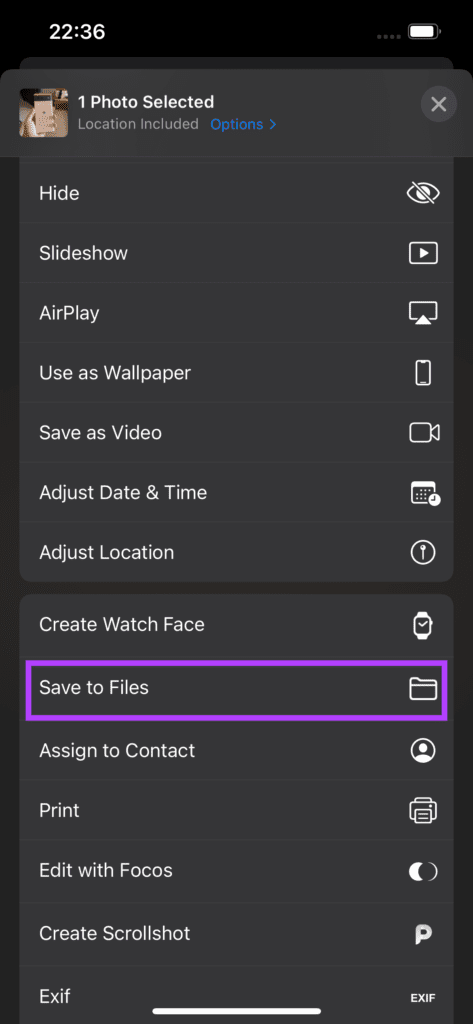
Step 3: Select the Save to Files option.
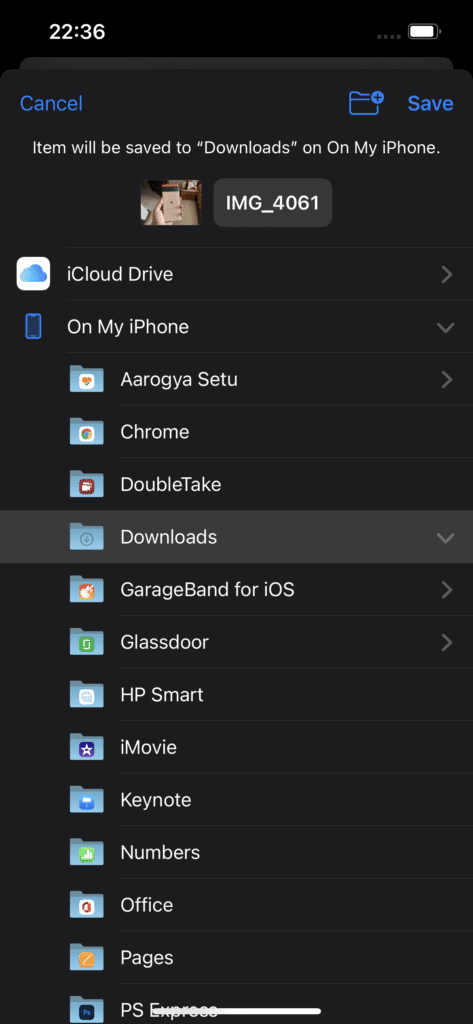
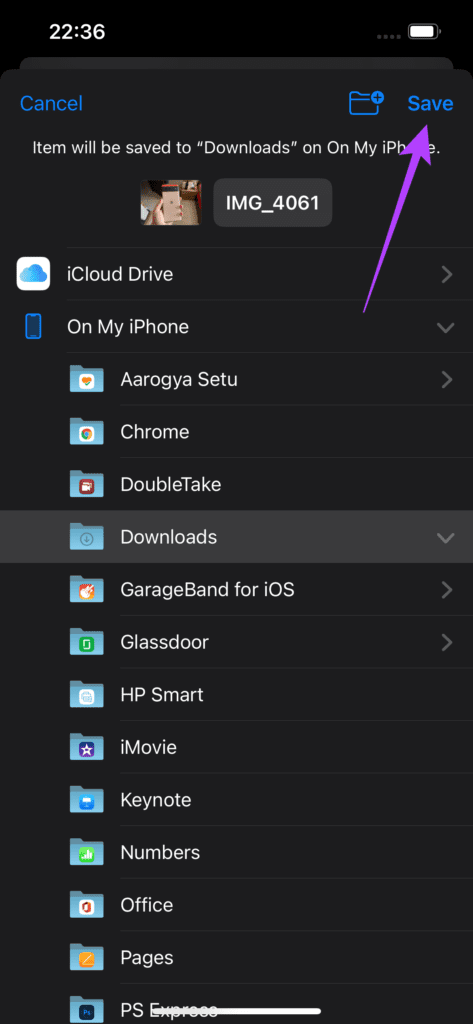
Step 4: Choose which folder you want the image to be saved in.
Step 5: Tap on the Save button in the top-right corner.
Step 6: Open WhatsApp on your iPhone and navigate to the chat where you want to send the image.
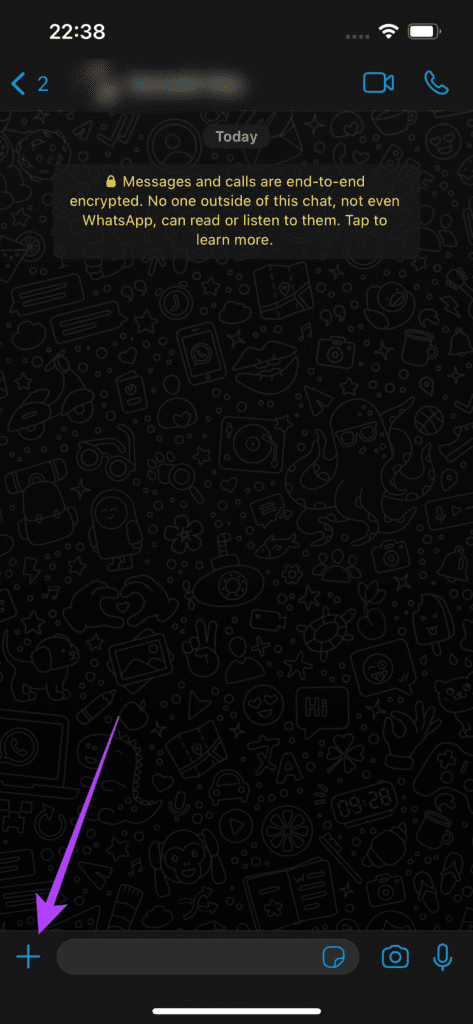
Step 7: Tap on the ‘+’ button next to the chatbox.
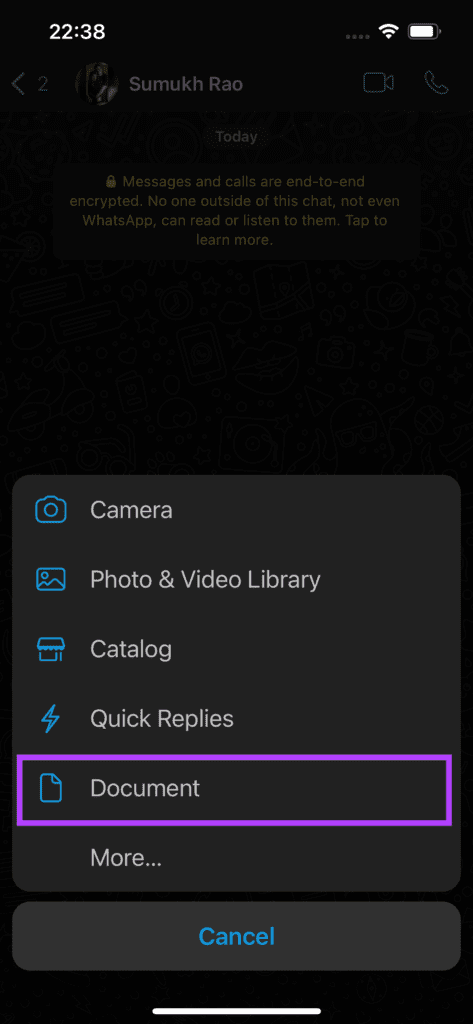
Step 8: Select Document.
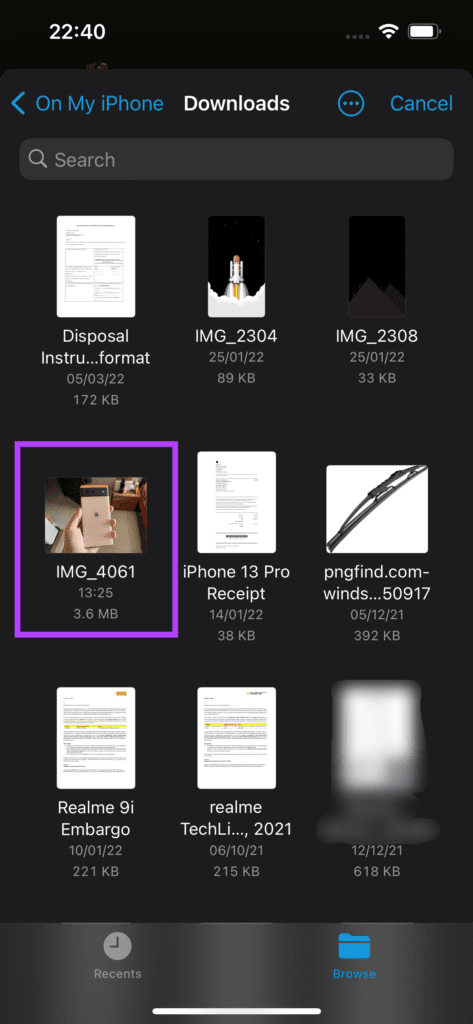
Step 9: You will be taken to the Files app. Navigate to the folder where you saved the photo in the previous steps.
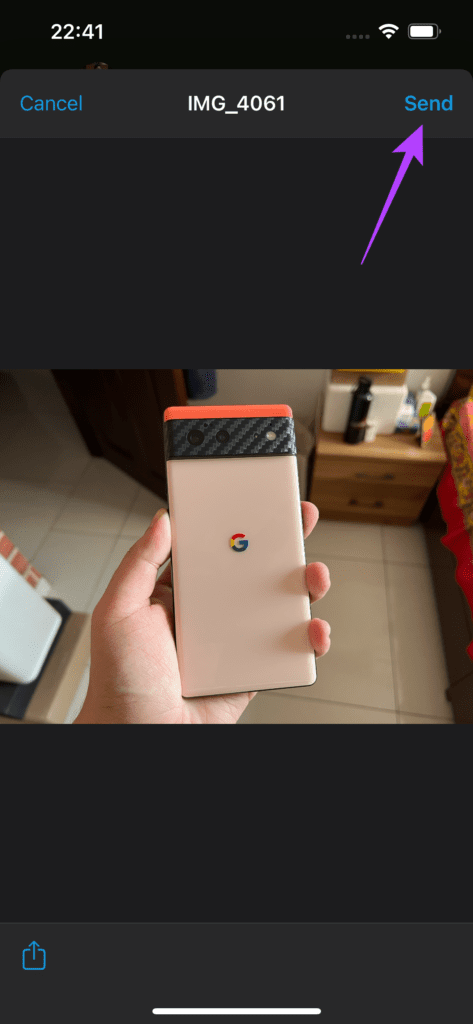
Step 10: Select the photo you want to send. Tap on Send in the top-right corner.
Your photo will now be sent in the best possible resolution. This is useful if you want to send high-resolution images like wallpapers or images that contain small text like scanned documents.
Send High-Quality Photos on WhatsApp
You can now send photos with lesser compression on WhatsApp all the time. Of course, the photos will still not be of the original quality. You can send full-resolution photos with absolutely no compression if you wish to send them as documents.

