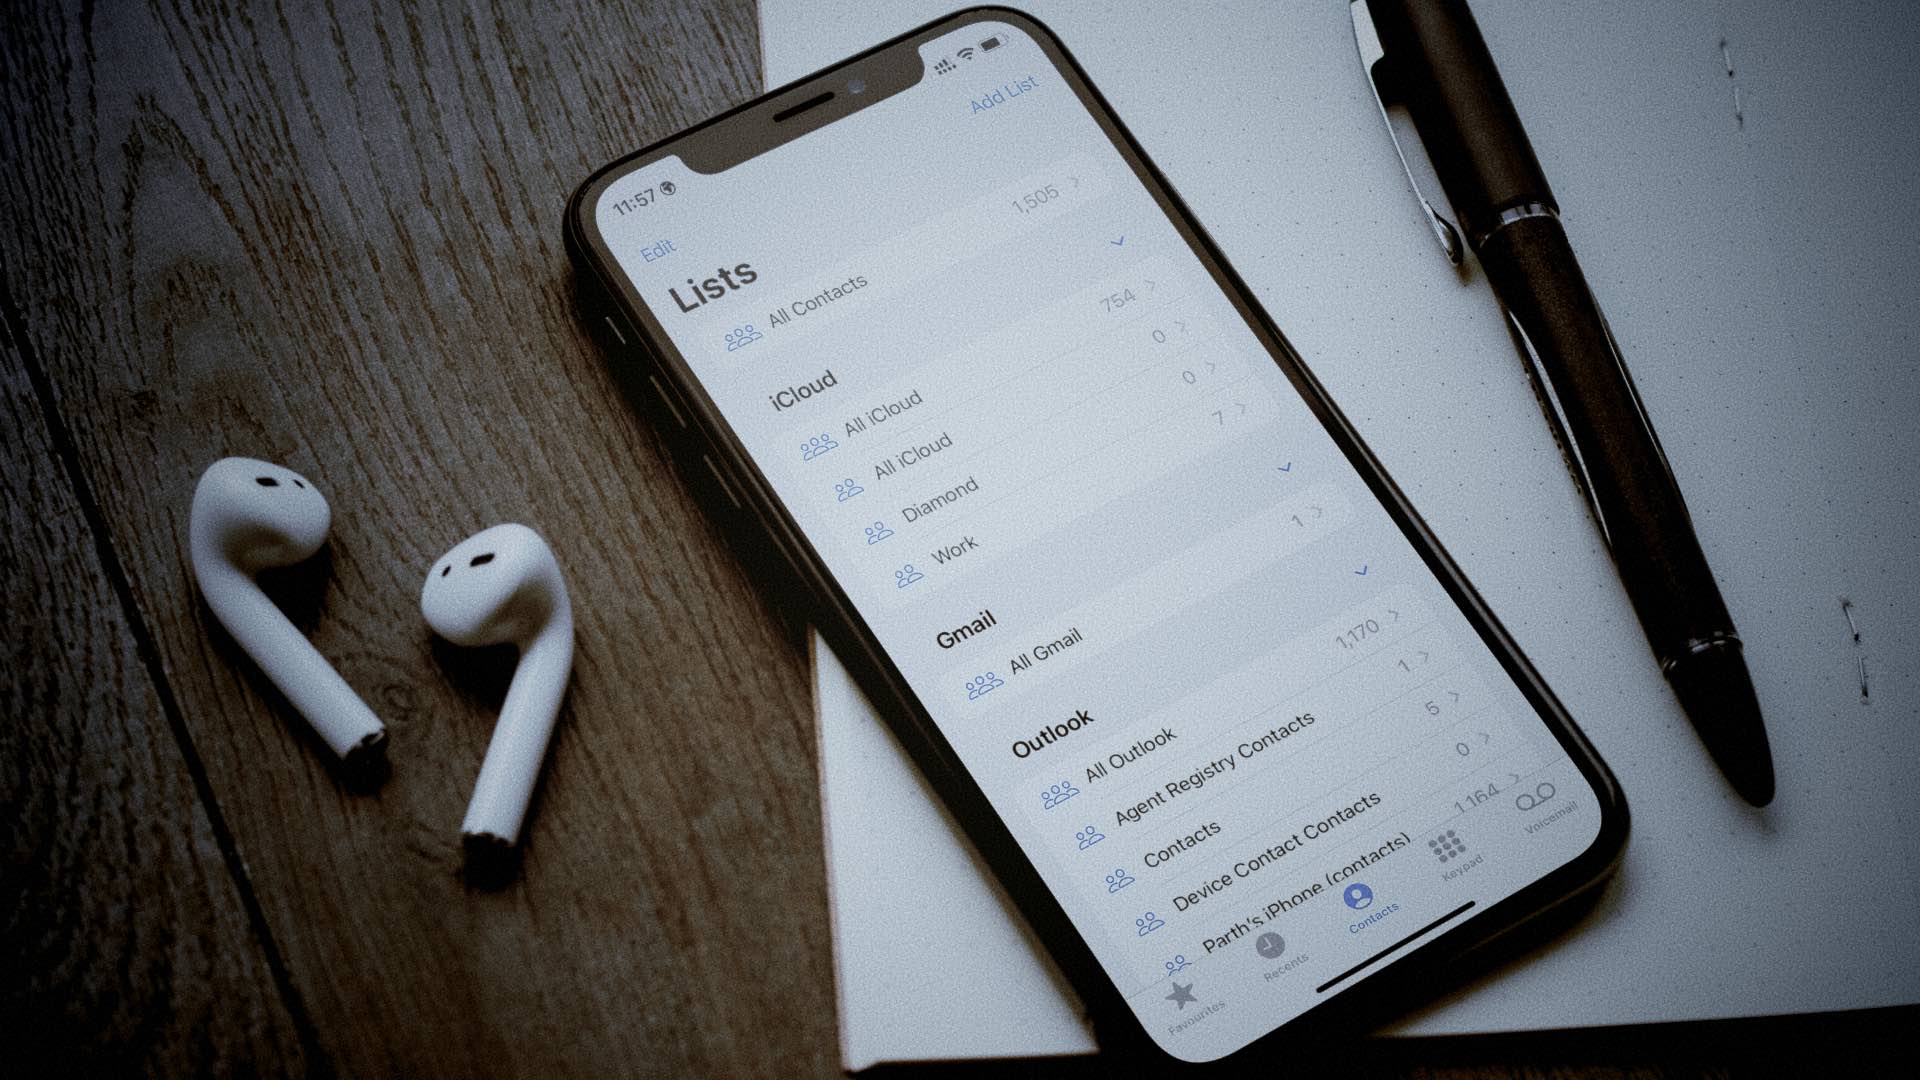
Before iOS 16, you had to rely on third-party alternatives or the iCloud web to create contact groups. It wasn’t the most convenient solution. Apple has made it dead simple to create the same in the Contacts app on iPhone. Before you get started, make sure your iPhone runs iOS 16 update. Otherwise, you won’t find an option to create lists on iPhone. Here’s how you can create or remove contacts lists on your iPhone.
Update Your iPhone to iOS 16
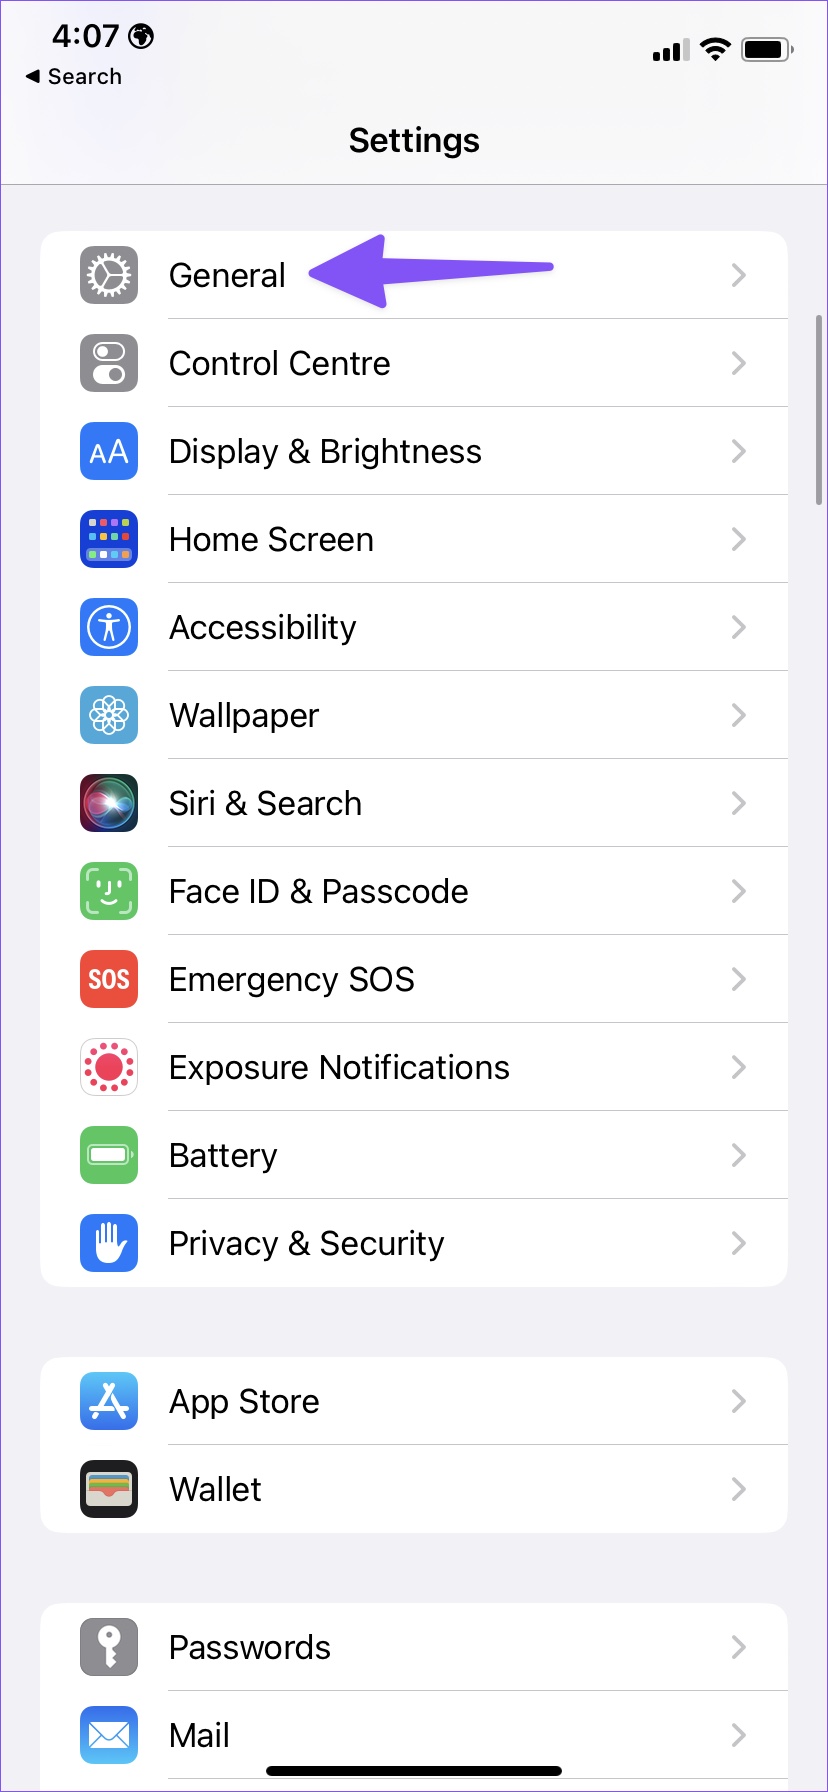
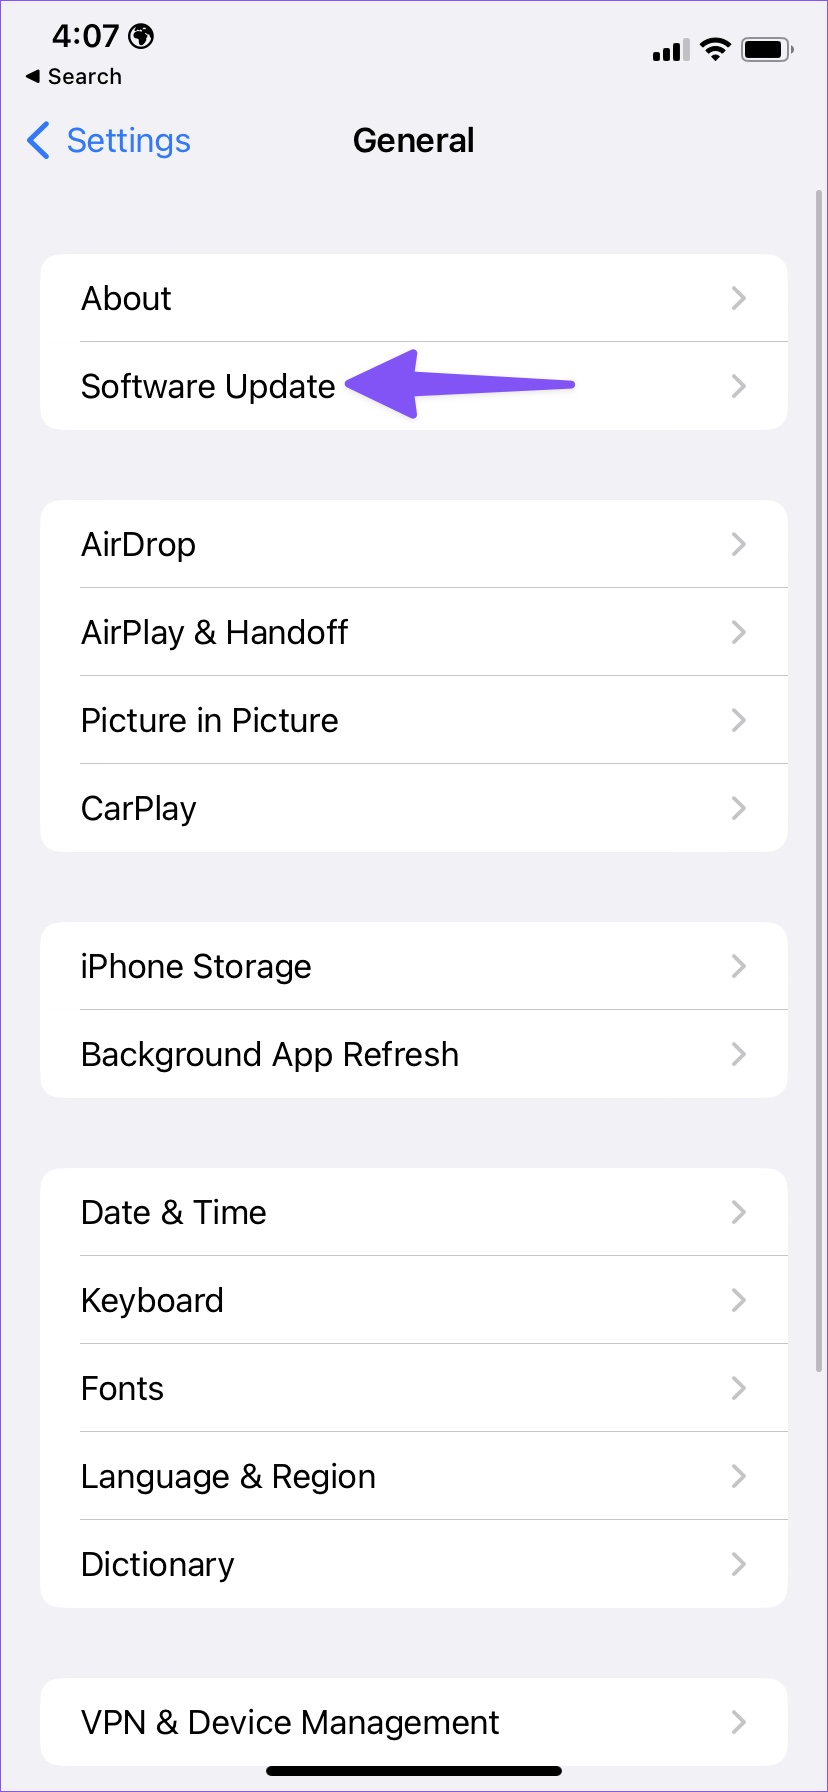
The ability to create a contacts list is a part of iOS 16 update for iPhone. So ensure your iPhone runs iOS 16, which is set to be available publicly in fall this year. Follow the steps below to check for the iOS 16 updates. Step 1: Open the Settings apps on your iPhone. Step 2: Scroll to General. Step 3: Tap Software Update. Step 4: Download and install the latest iOS update. The iOS 16 is available in public beta at the time of writing. You can sign up for the beta version from the Apple Beta Support Program and enjoy all new iOS 16 improvements.
What Is Contacts List on iPhone
A Contacts list makes it easier to create lists (or groups) of specific bunch of contacts on the iPhone. You can create different lists for work, friends, family, colleagues, customers, etc. That means you won’t have to scroll or search for specific contacts if you have to send a message, text, or an email to all of them. You can also use the Contacts app on Mac or iCloud website to create a contacts group, but Apple’s implementation in iOS 16 is better and does the job without putting down the phone. Lists are similar to groups, but you can now create, edit, and manage them on your iPhone. You can also send an email or message to everyone on the list with a single tab (more on that later).
Create Contacts List on iPhone
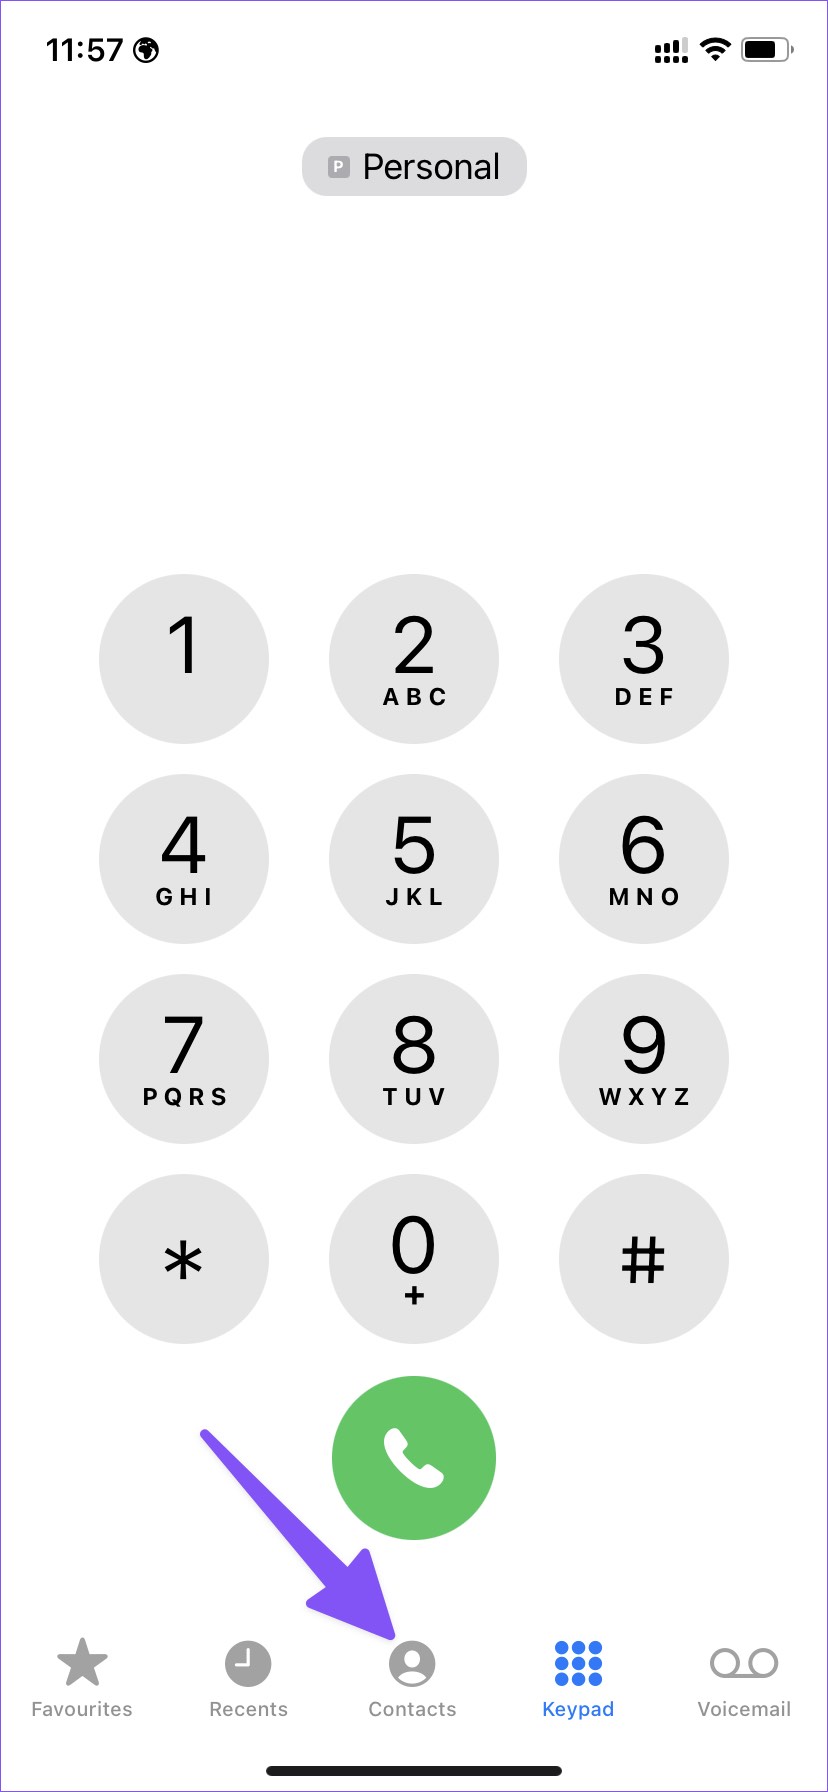
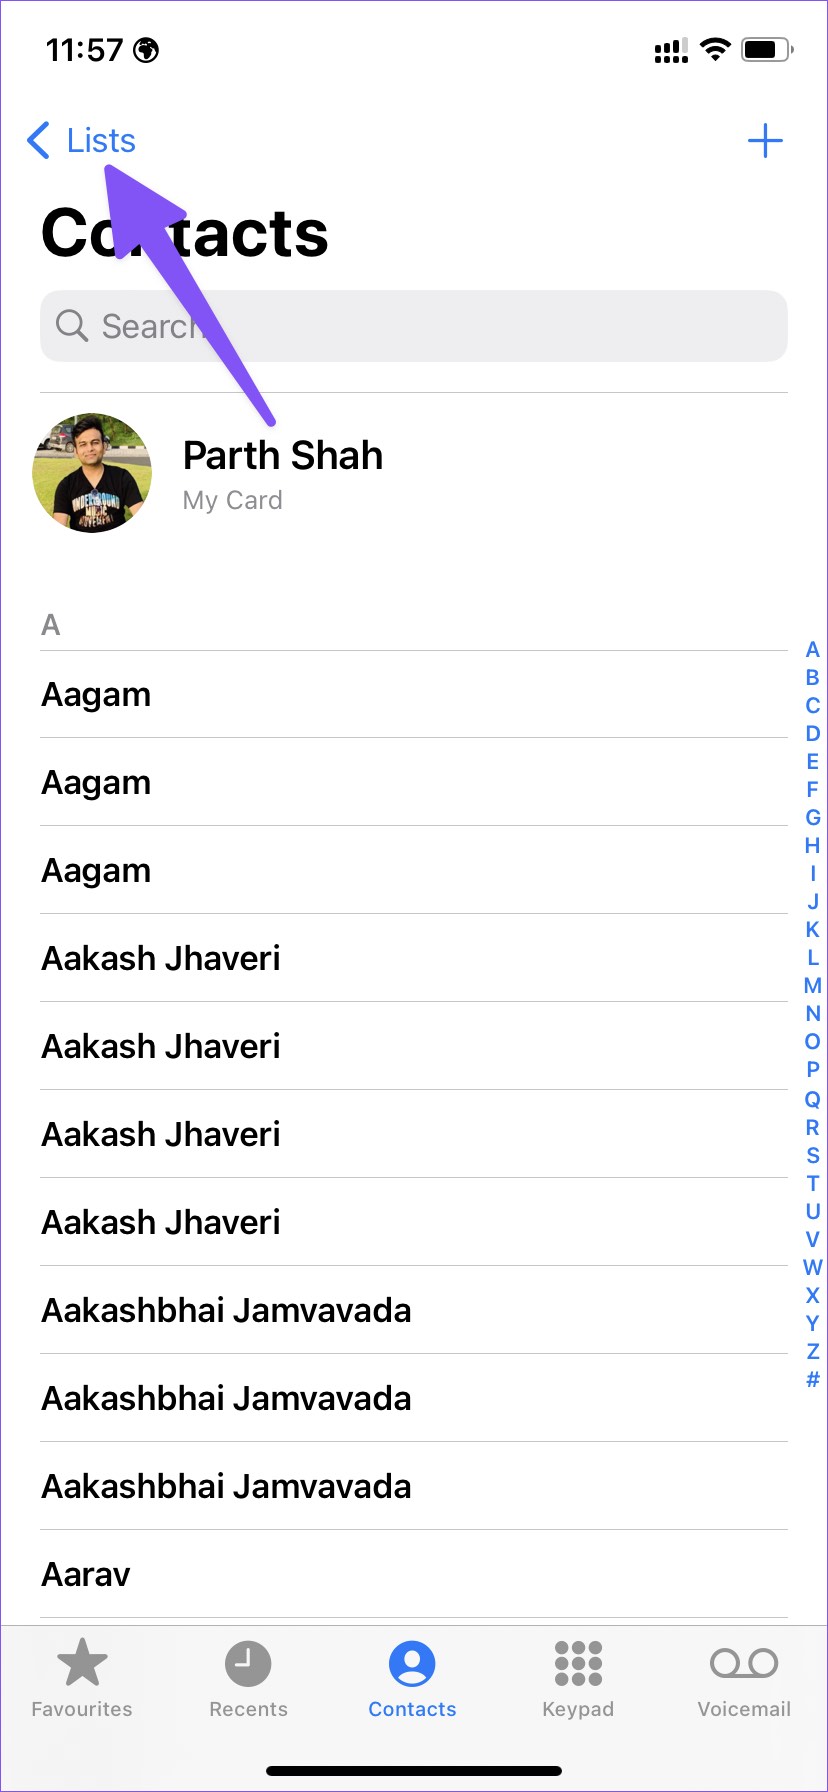
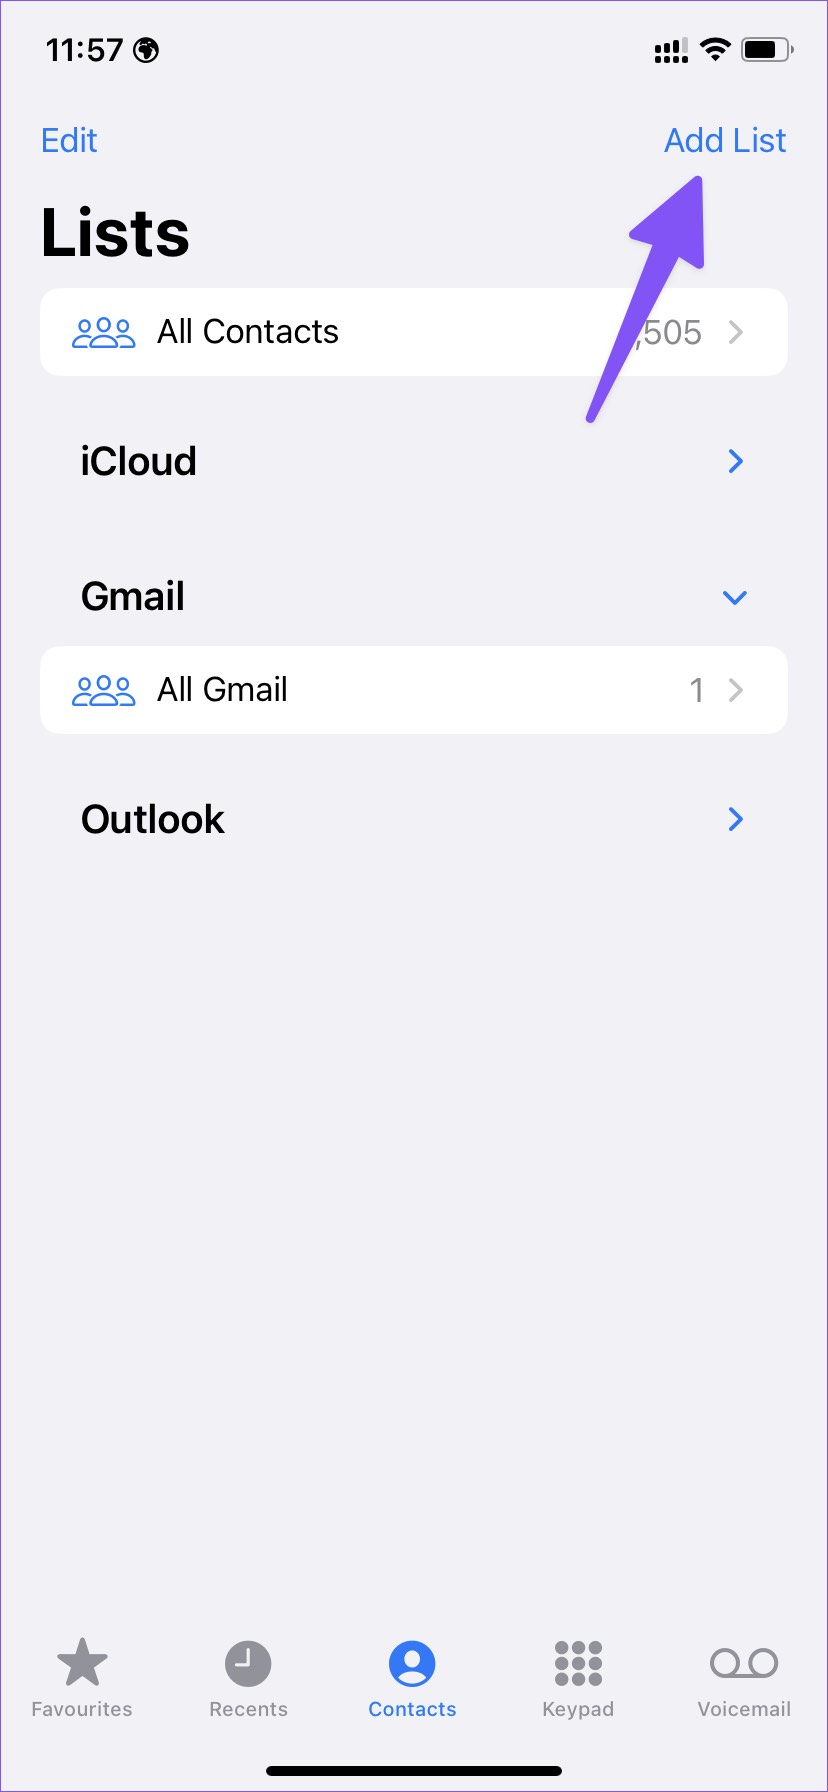
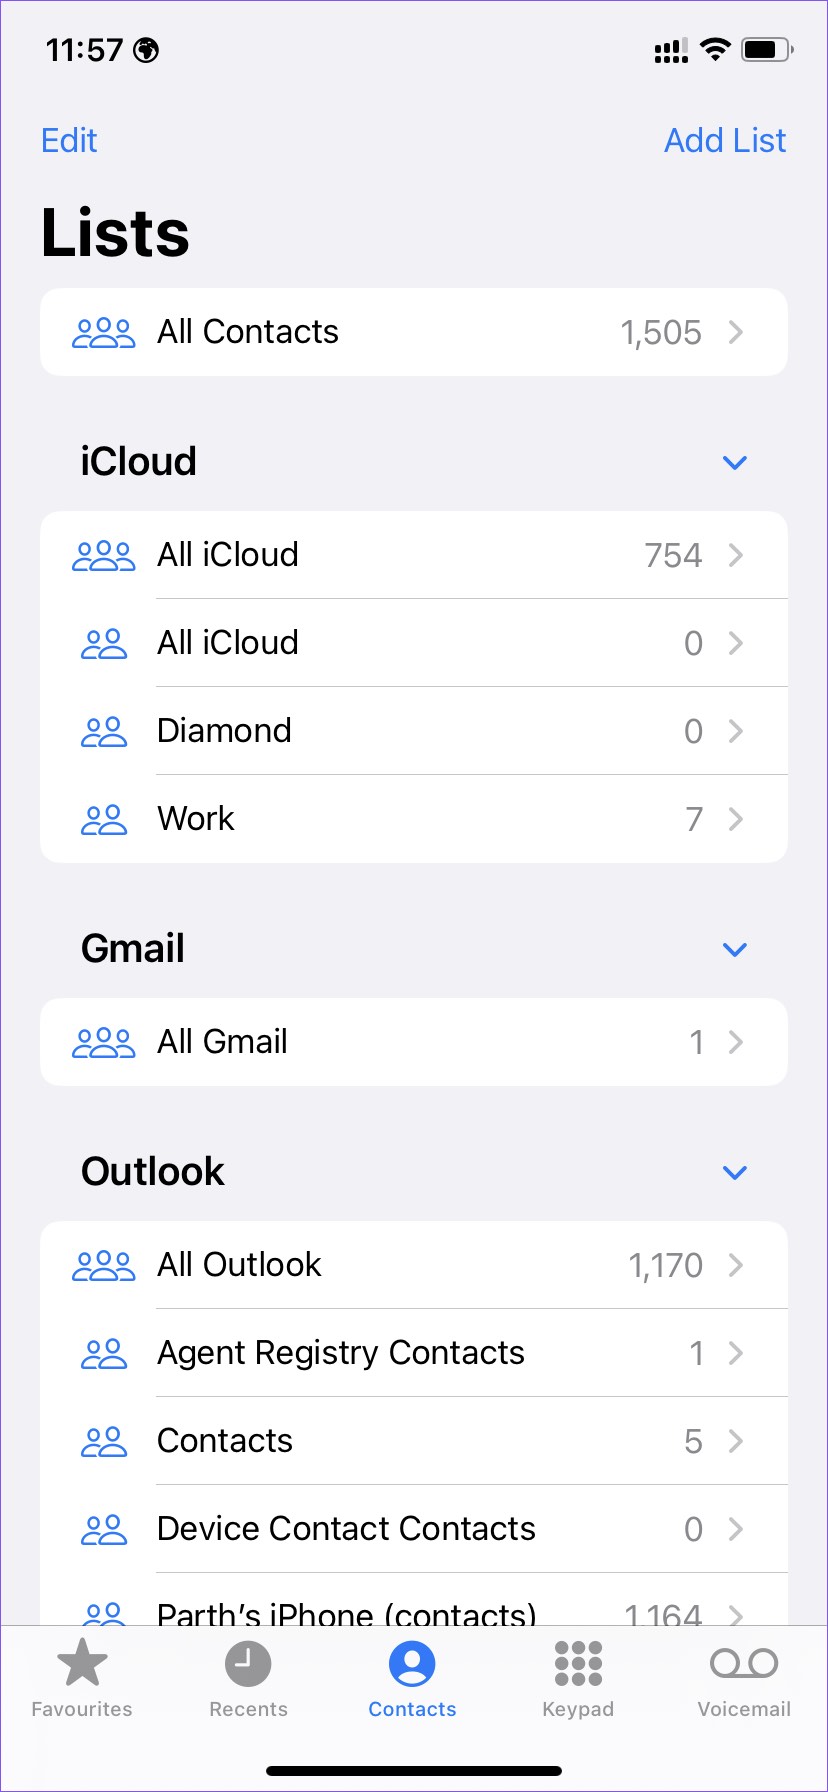
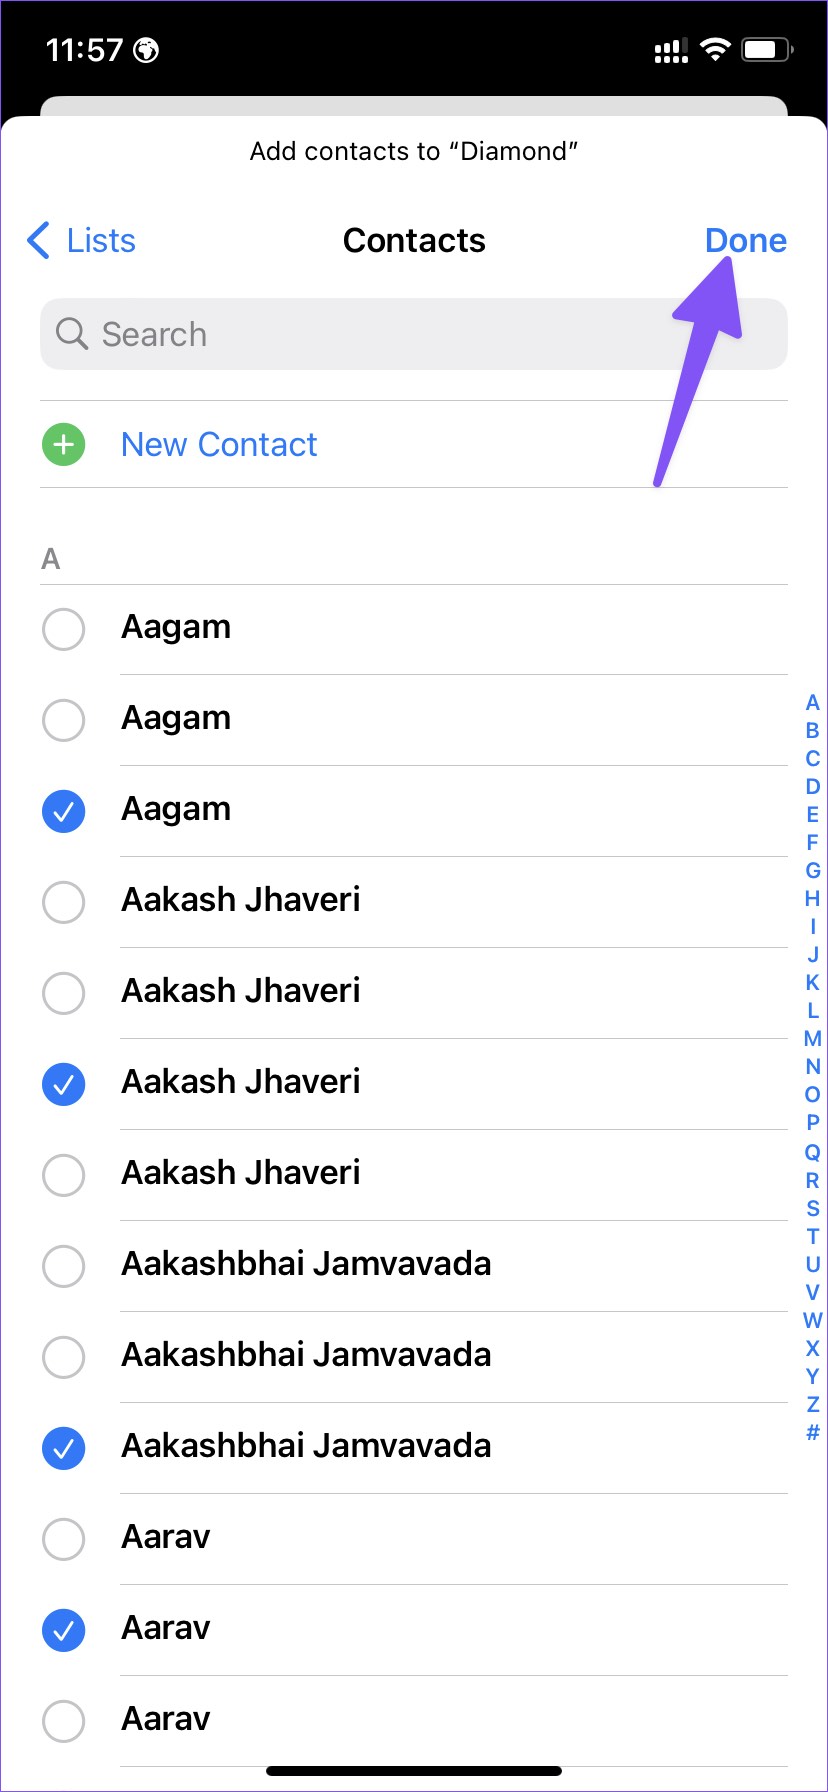
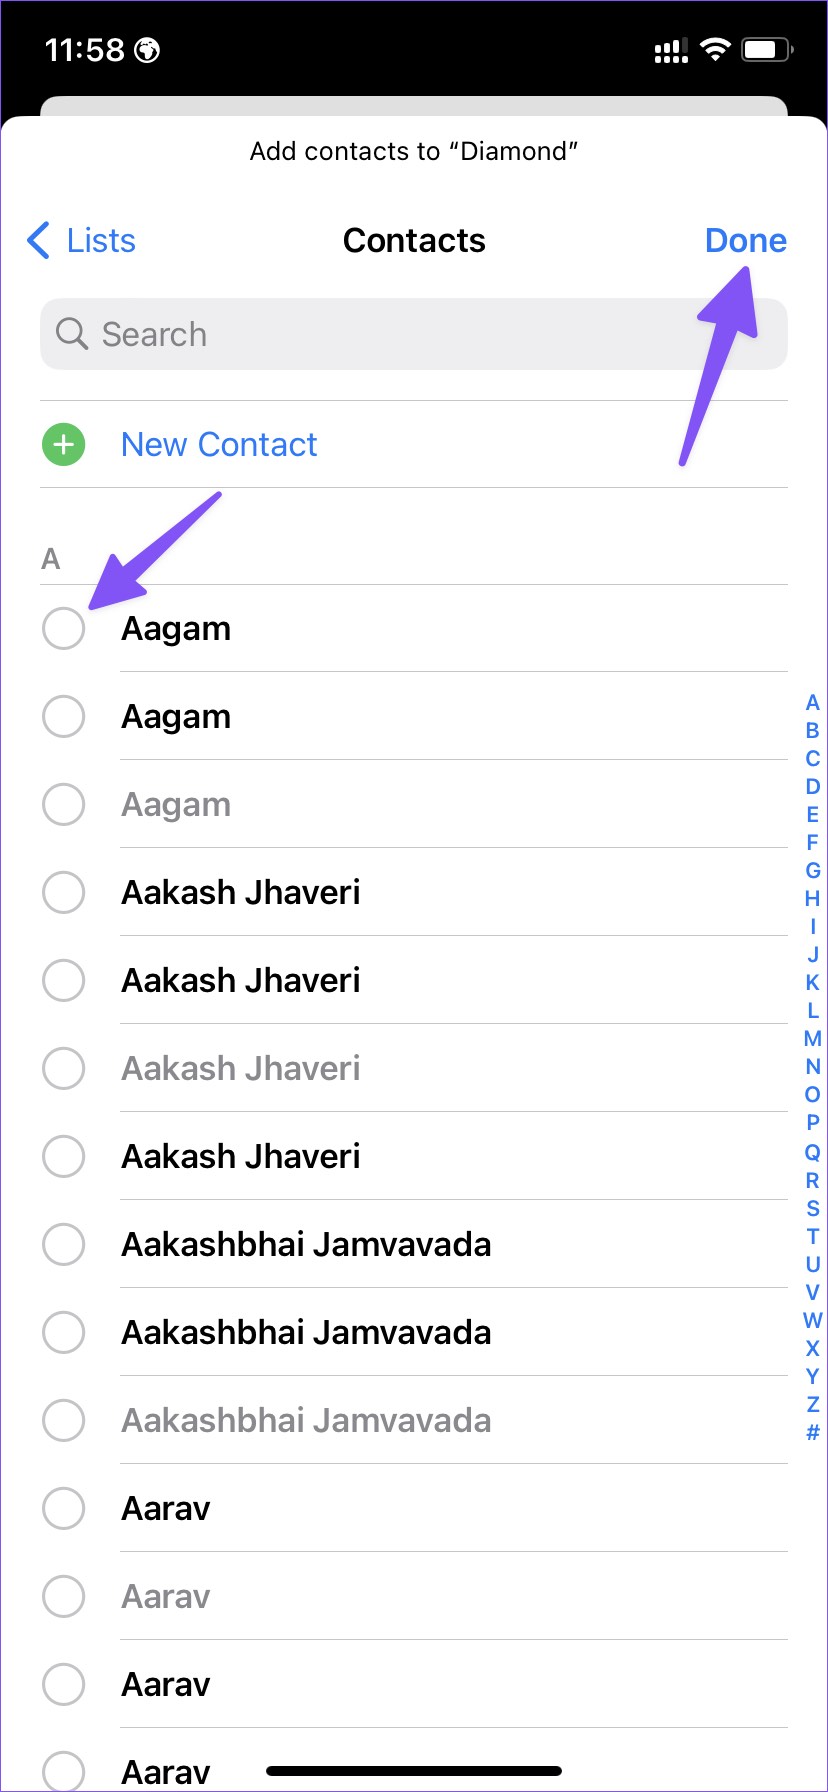
Apple lets you utilize the Phone app or the Contacts app to create a list. Follow the steps below. Step 1: Open the Phone app on your iPhone. Step 2: Go to the Contacts tab. Step 3: Select Lists in the top left corner. Step 4: Select Add List in the top right corner. Step 5: You can create a list in iCloud or Gmail (if you have added Gmail contacts on your iPhone). Let’s select iCloud. Step 6: Enter the list name and hit Done on keyboard. Step 7: The Contacts app will create an empty list. Step 8: Tap on the list and select ‘Add Contacts’. Step 9: Select the circle beside the contacts you want to add to a list. When you’ve select relevant contacts, tap Done in the top-right corner. You can also create new contacts for your specific list from the same menu. Your new contacts list is now ready to use. You can create as many contacts lists as you want.
Edit or Delete Contacts List on iPhone
You can easily edit or delete an existing contacts list. Here are the steps to make changes. Step 1: Open the Phone app on iPhone and move to the Lists menu (refer to the steps above). Step 2: Open an existing list and select + in the top right corner. Step 3: Select contacts you want to add to the existing list and tap Done. Step 4: If you want to remove contacts from a list, swipe left on contact and tap Remove.
Delete Contacts List on iPhone
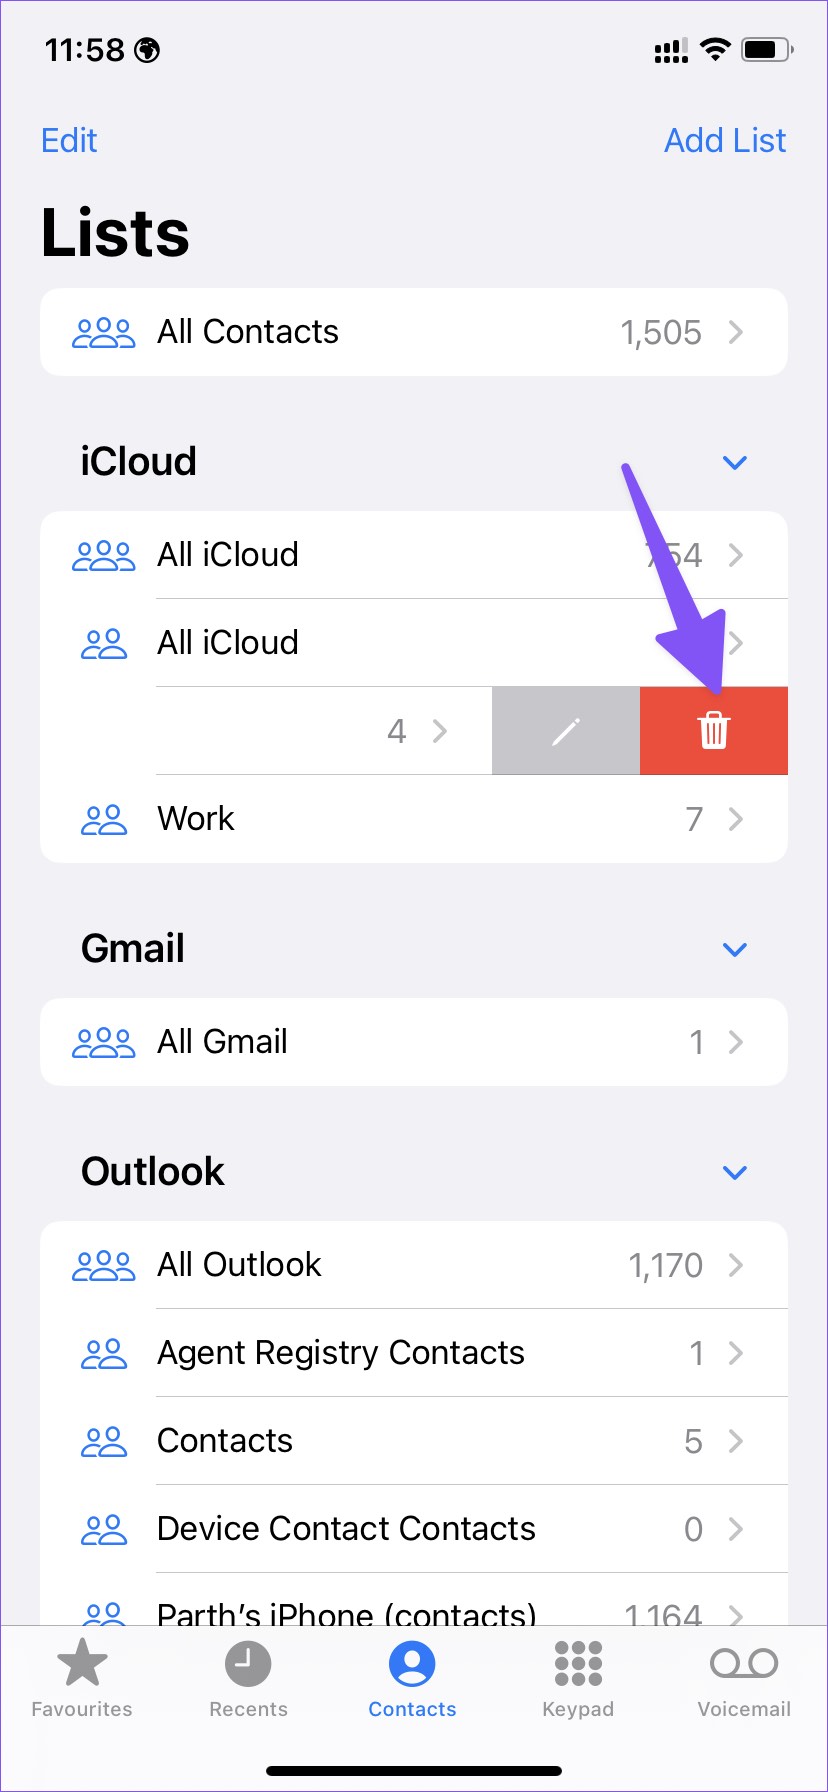
Here’s how you can delete a contacts list on your iPhone. Step 1: Open the Contacts list on your iPhone (check the steps above). Step 2: Swipe left on a Contacts list and hit the delete icon.
Message or Email Everyone on the Contacts List
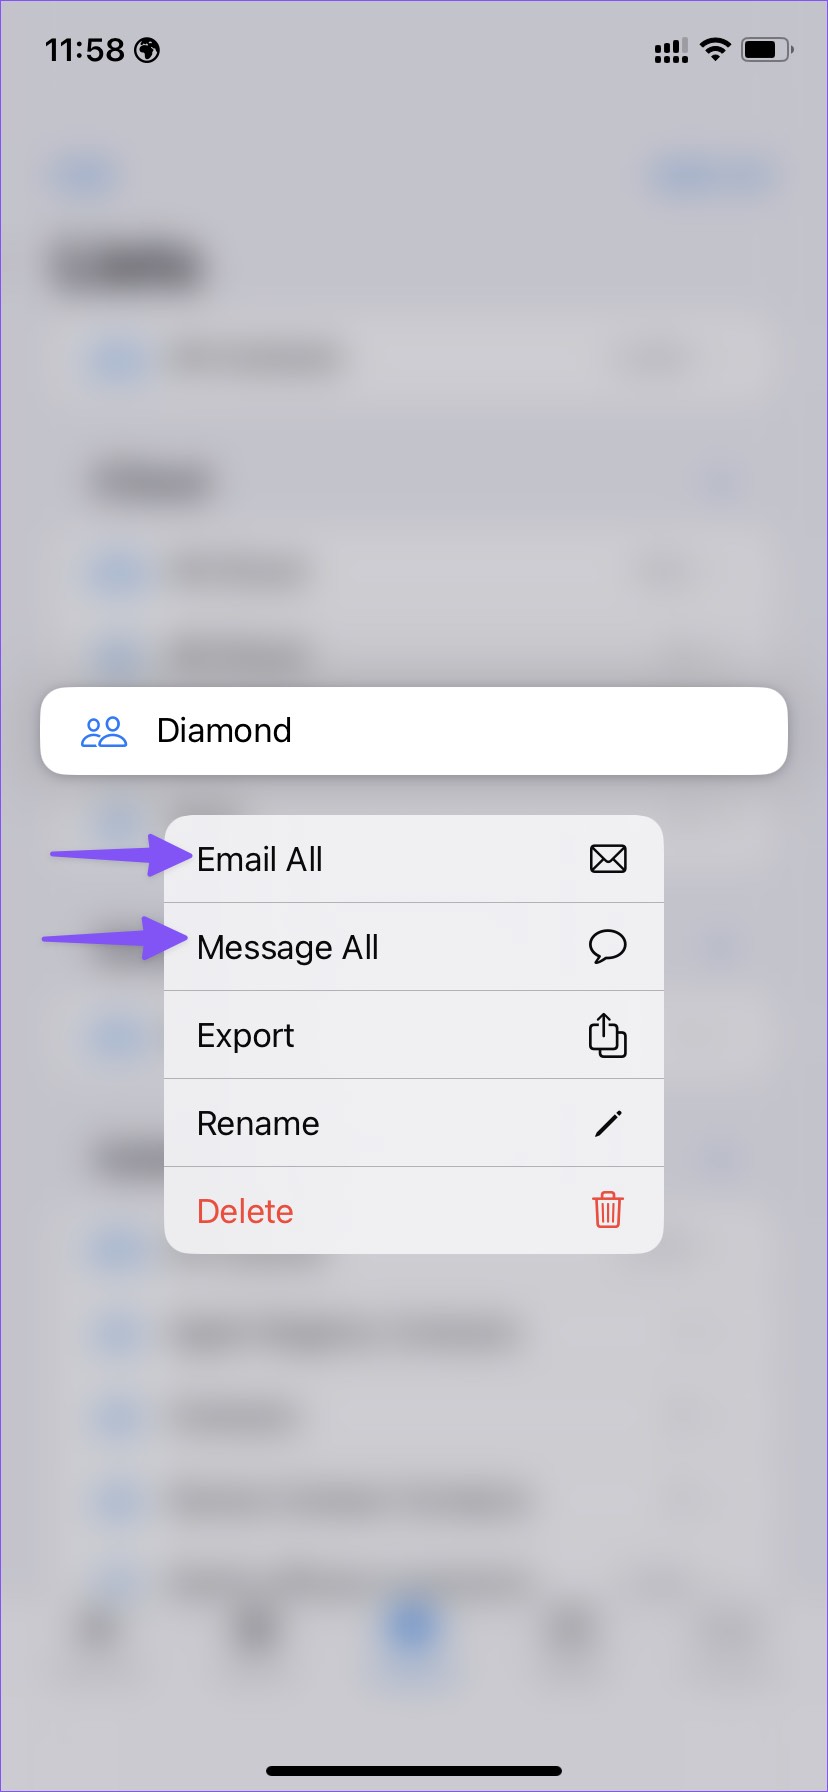
The contacts list makes it convenient to message or email relevant contacts with a single tap. Step 1: Launch Contacts on iPhone. Step 2: Long tap on a contacts list you want to use. Step 3: Select Email All or Message All and share your message with everyone. If you select Message All, it will open the Messages app. Email All option will open the default email app on iPhone. However, the email will only be sent to those contacts with an email address.
Organize Contacts Like a Pro
Once you create lists on your iPhone running iOS 16, they are readily available on iPad (iPadOS 16) and Mac (macOS Ventura). How do you plan to use your contacts list on your iPhone? Share your thoughts in the comments below.
