Besides, password-protecting the folder prevents accidental deletion and also secures the folder in the event of a breach. Moreover, Windows offers the ability to secure data using a built-in encryption tool, BitLocker. However, you must have Windows 11 Pro or Enterprise edition to use this encryption tool, which most people do not have. But don’t worry! If you’re using Windows 11 Home edition, we present a simple yet effective way to password-protect a folder. Let’s dive in.
How to Lock a Folder on Windows 11 Using Built-in Encryption Function
You can encrypt files and folders using Windows 11’s built-in encryption feature. So, here’s how to create a password folder on Windows 11. If you’re running the previous version, our guide on password-protecting folders in Windows 10 would help. Note: The steps to encrypt files on Windows 11 are the same as those for encrypting folders. Step 1: Open Windows File Explorer and navigate to the folder you want to password-protect.
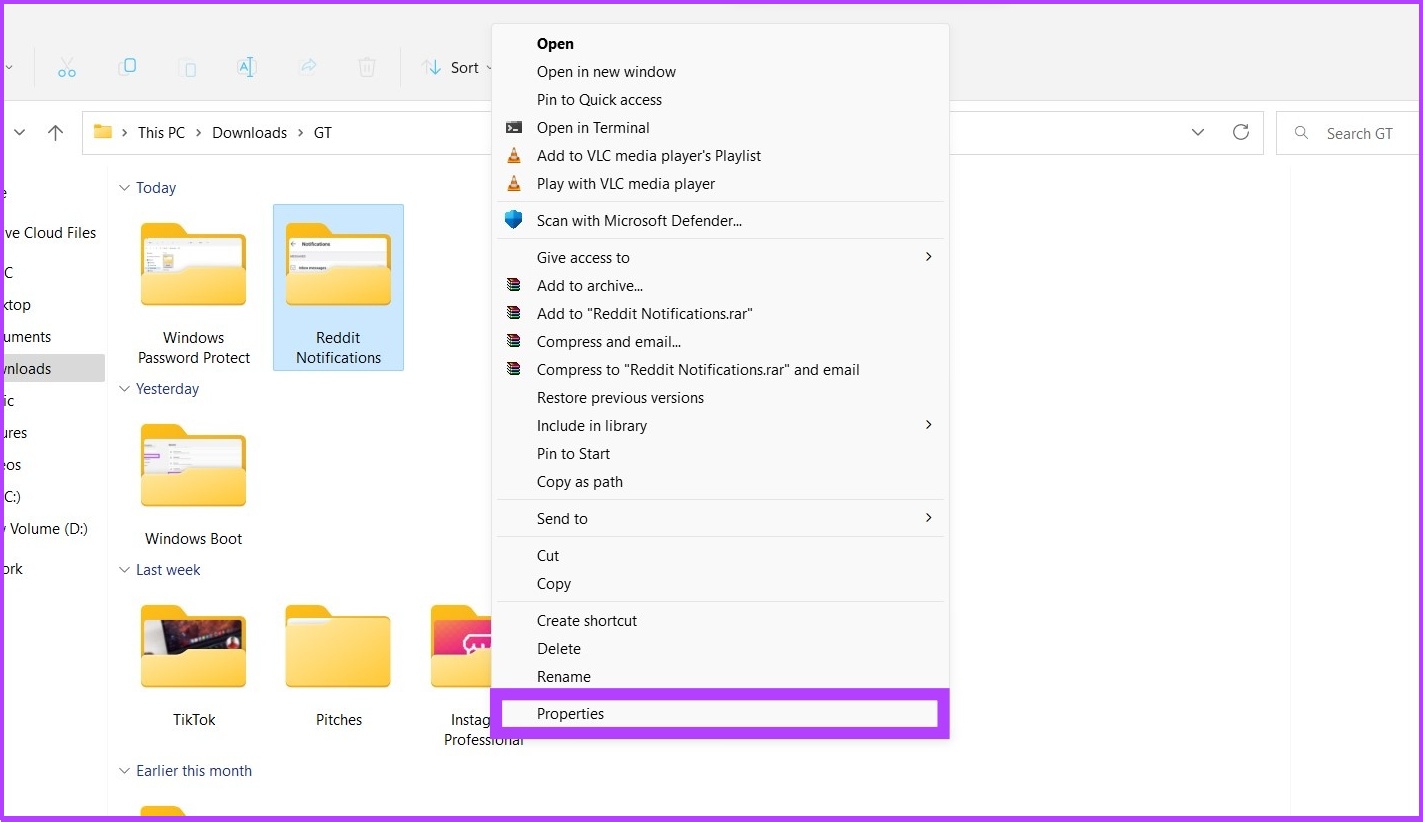
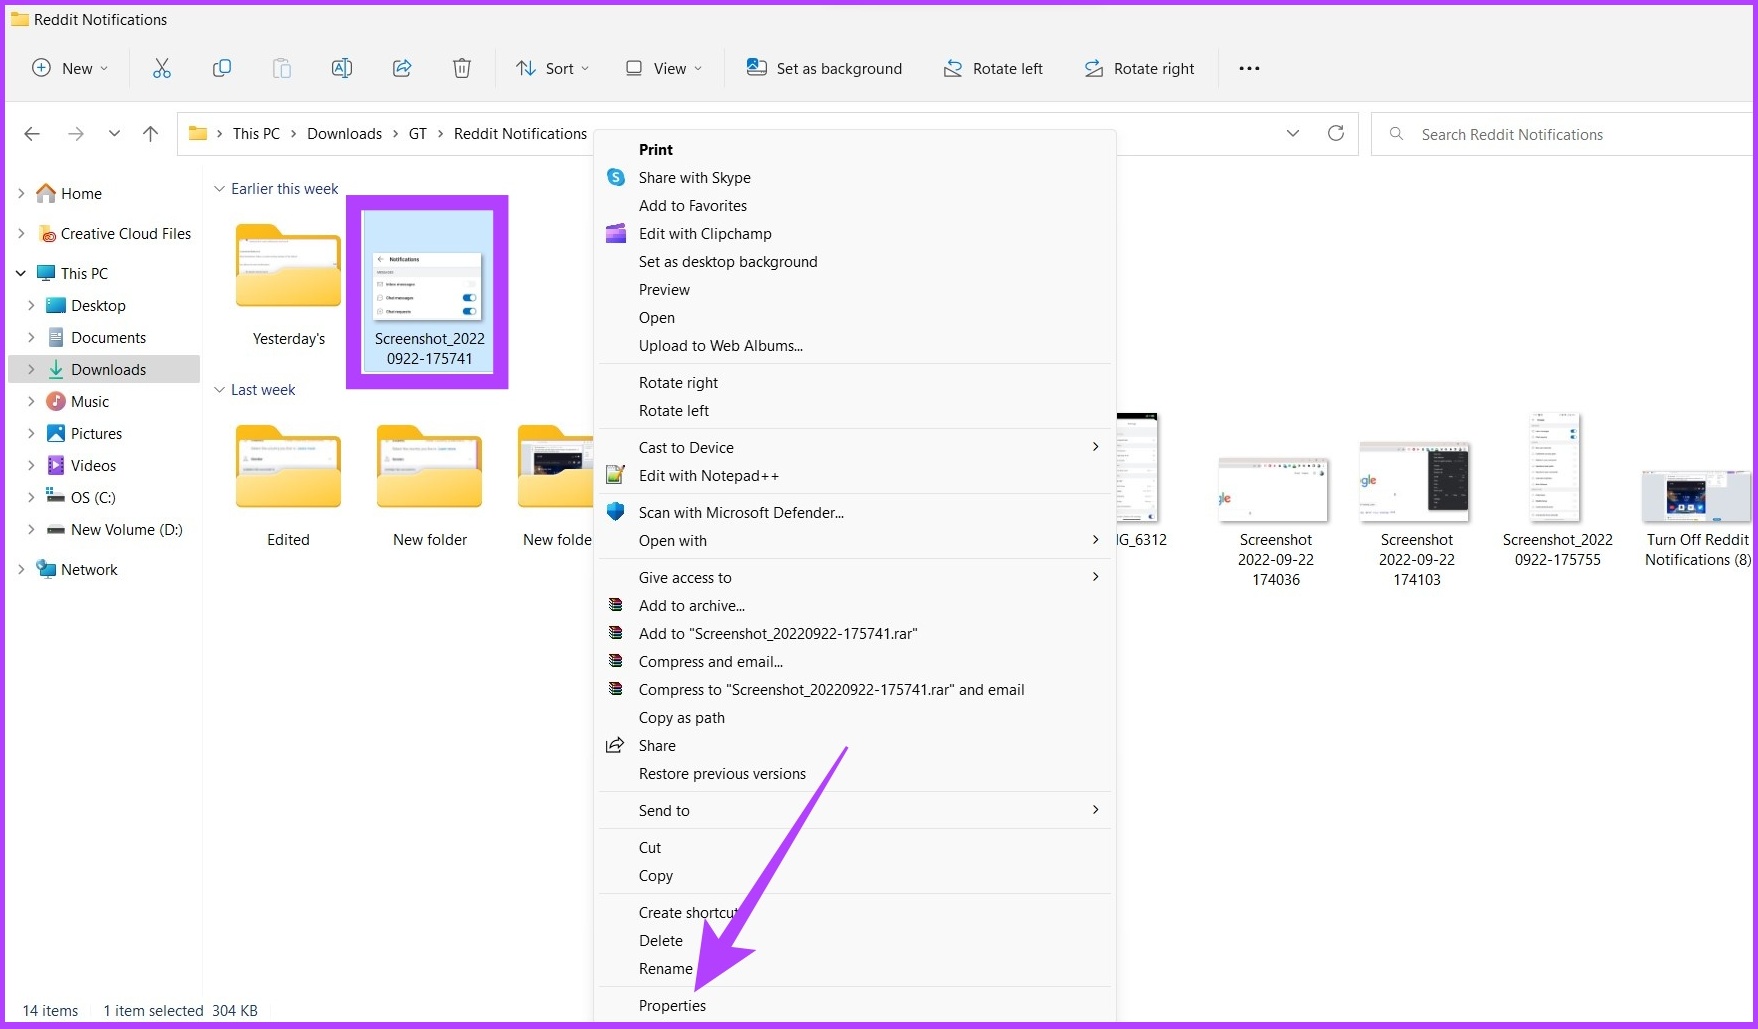
Step 2: Right-click on the folder and select ‘Show more options’. Now, go to Properties.
Step 3: Under the General tab, click Advanced next to Attributes.
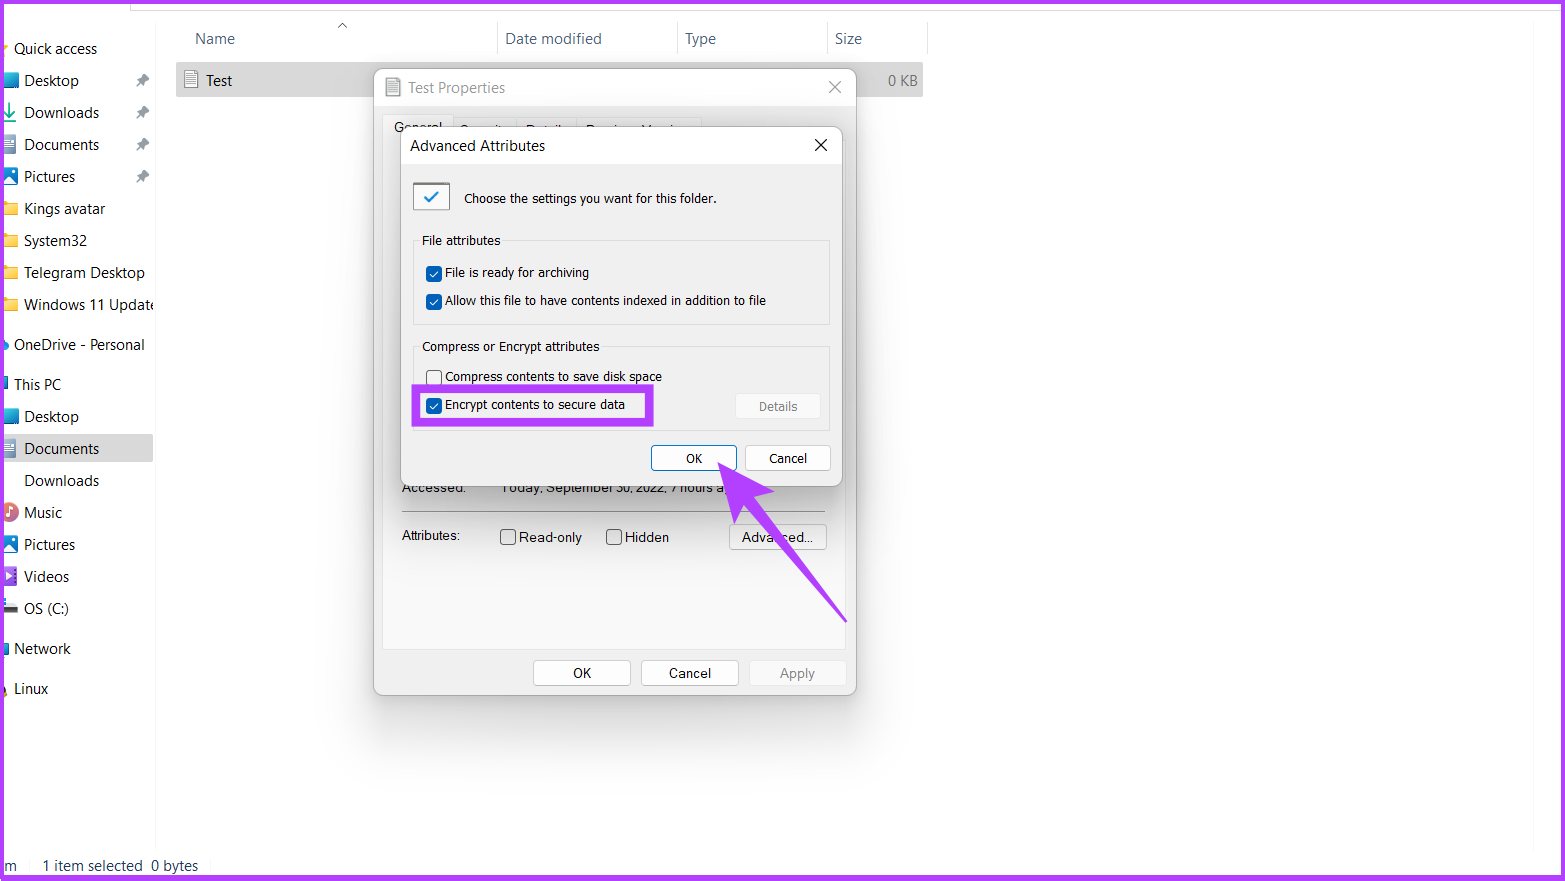
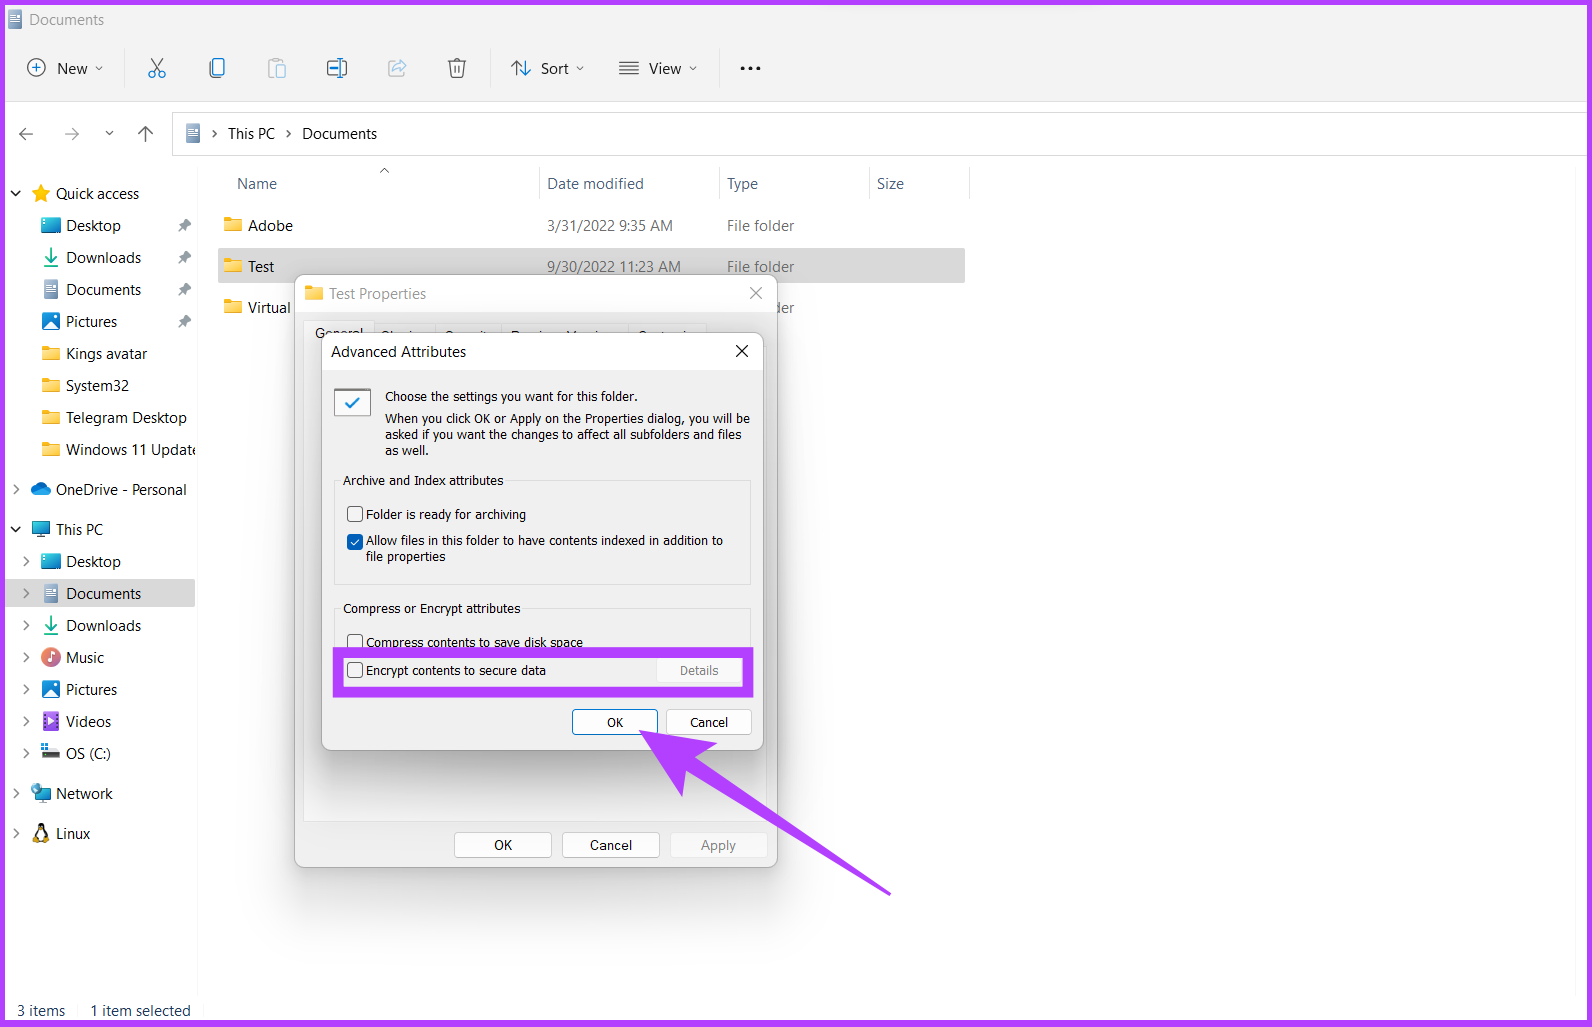
Step 4: Check the box next to ‘Encrypt content to secure data’ Under Compress or Encrypt attributes and click on OK.
If the ‘Encrypt content to secure data’ option is greyed out, follow the steps below or jump to Step 8 directly.
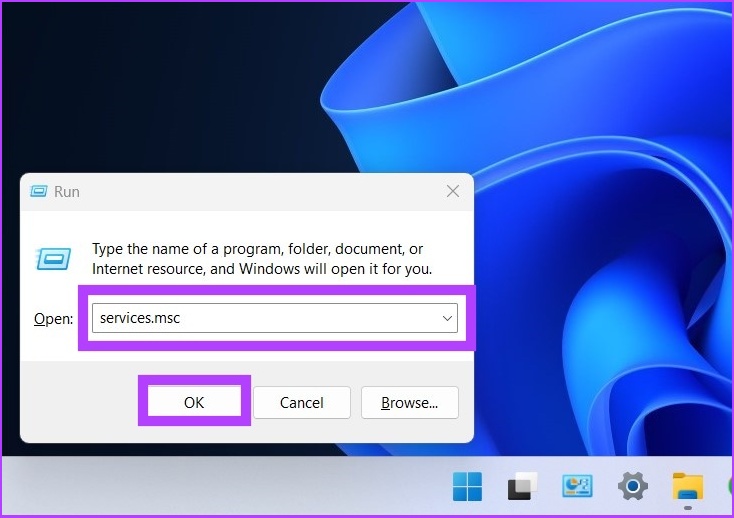
Step 5: Open Run or click ‘Win key + R’ and type ‘services.msc.’
Step 6: Double-click on ‘Encrypting File System (EFS)’.
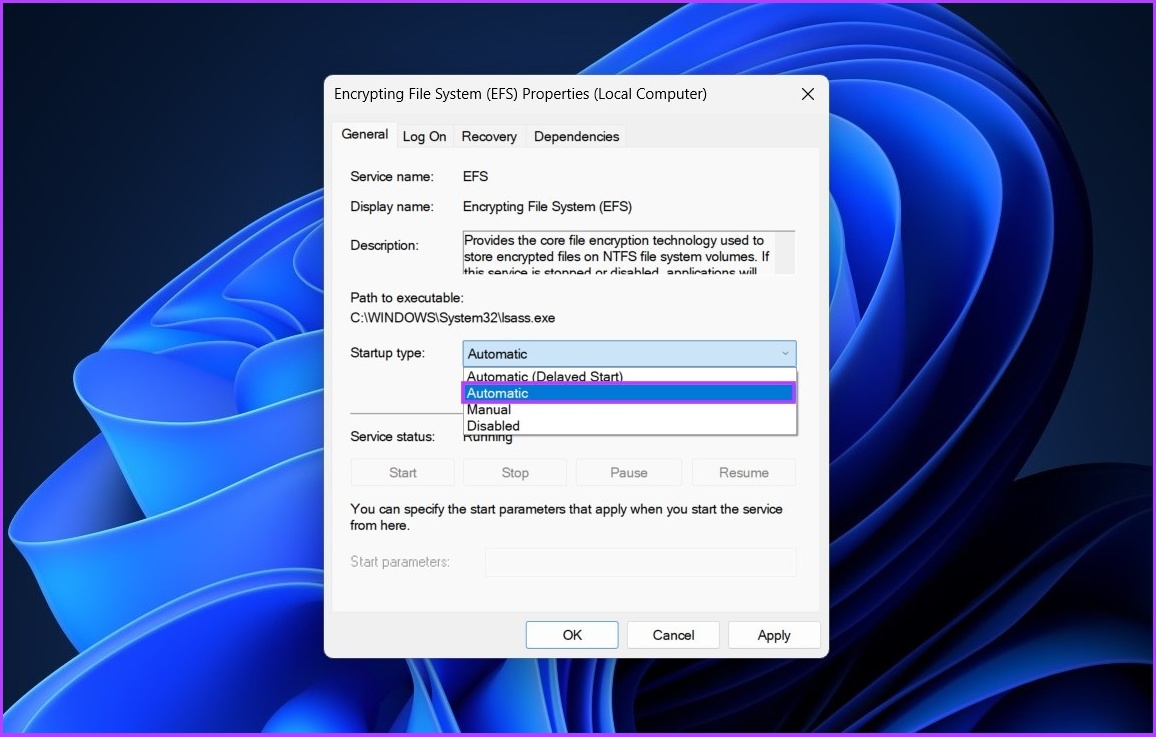
Step 7: Under General, click on the drop-down next to Startup type and select Automatic.
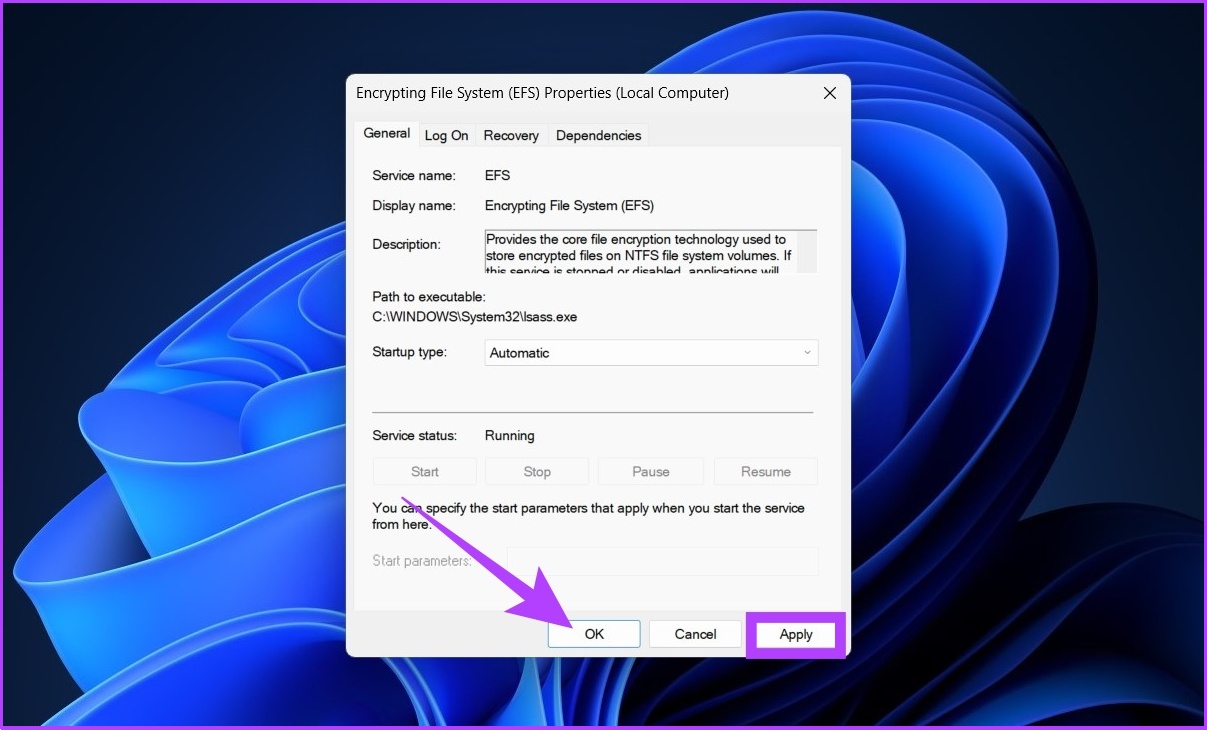
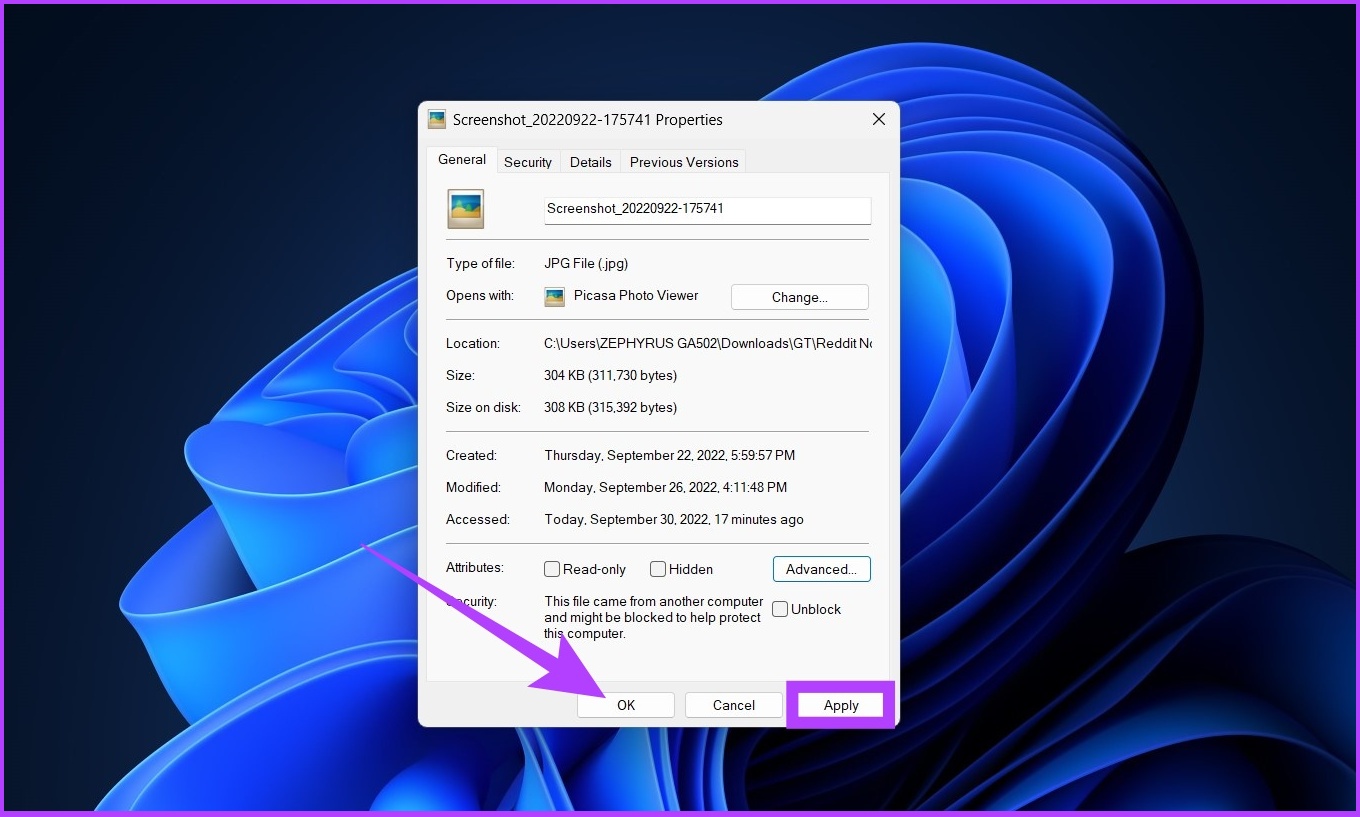
Step 8: Now, click on Apply and then OK.
It is necessary to restart the computer for the changes to take effect. If you’re on Windows 10, check out our guide on encrypting drives by bypassing TPM. Tip: You can also create personalized run commands for Windows.
How to Remove the Added Password From a Folder on Windows 11
Removing a password from a file or folder on Windows 11 is fairly straightforward. Besides, if you find it difficult to remember passwords, you can also hide files and folders in Windows instead of password-protecting them. Follow the below steps to remove folder encryption: Step 1: Navigate to the file or folder you want to decrypt and right-click on it.
Step 2: Now, go to Properties.
Step 3: Under the General tab, click on Advanced next to Attributes.
Step 4: Uncheck the ‘Encrypt content to secure data’ option.
Step 5: Press Apply and Ok.
Bonus: Use Third-Party Software to Create Password Protected Folders on Windows 11
A third-party tool or software can help you secure your files and folders if you don’t want to follow the above-mentioned steps or maybe want to get things done quicker. Although third-party software don’t provide Windows-like security, to compensate, they come with a lot of features and are easy to use. One such application is Folder Lock. This is an easy file locker for Windows 11. If you are choosing this option, we had already covered a step-by-step approach to secure your files and folders using Folder Lock.
One of the best things about this program is that it offers backup/sync features and has both free and premium plans. You can use the below link to download the software on your device. Download Folder Lock
Protecting Sensitive Data on Windows 11
Protecting confidential information in files and folders can be challenging in today’s world. Keeping your computer’s data protected ensures that no sensitive personal or professional information gets deleted or leaks out by accident. Do you have any experience with data deletion or leaks in Windows? Let us know in the comments.
