Live Photos are a great way to capture and relive quick moments in everyday life. The feature also reduces the probability of capturing blurry photos since choosing the final image from a series of frames. While Live Photos look great when viewed on an iPhone, sharing a Live Photo on most platforms would only share a still image. If you wish to share the motion captured in the photo, a great way to do it would be to share it as a GIF. Here’s how you can convert your live photos to GIFs and share them on any social media or messaging platform you want.
Advantages of Converting Live Photos to GIFs
By default, the Photos app on iOS gives you the option to convert a live photo and share it as a video. While that is a good idea and maintains the original quality of the live photo, videos occupy more storage. Creating multiple short video clips from all your live photos will take up a considerable amount of storage on your iPhone.
Apart from occupying storage, sending videos on some social media or messaging platforms as it takes more time to render and consumes more bandwidth. GIFs are much smaller in size, albeit with a reduced quality. Sending a GIF is as simple as sending any still image. You can even create GIFs and use them to reply to comments on social media, similar to memes.
How to Add the Make a GIF Shortcut on Your iPhone
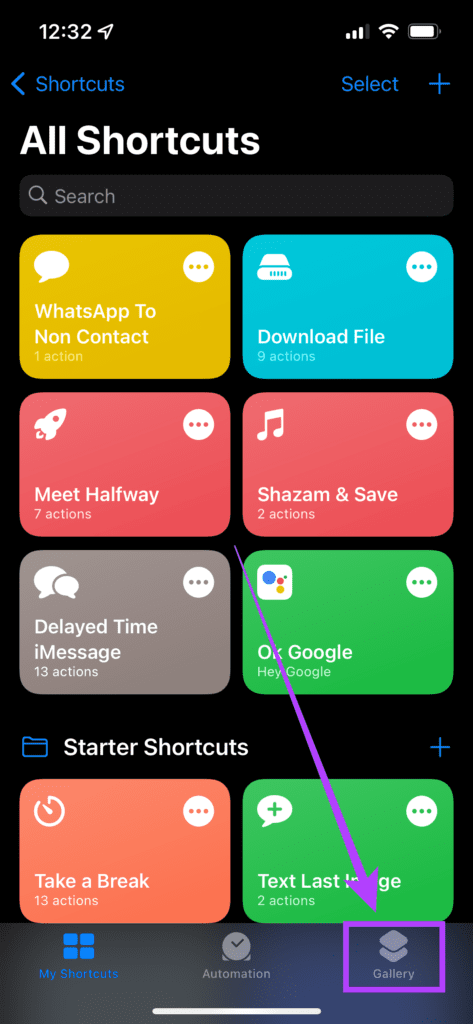
We’ll be using the Shortcuts app on your iPhone to save Live Photos you click as GIFs. Several third-party apps do this too, but most such apps are paid. This solution integrates directly within the Photos app and is more convenient. Step 1: Open the ‘Shortcuts’ app on your iPhone. If you don’t have the app installed for whatsoever reason or you had uninstalled it previously, head over to the App Store and install it.
Step 2: Any existing Shortcuts that you use will be displayed here. Navigate to the ‘Gallery’ option in the bottom bar.
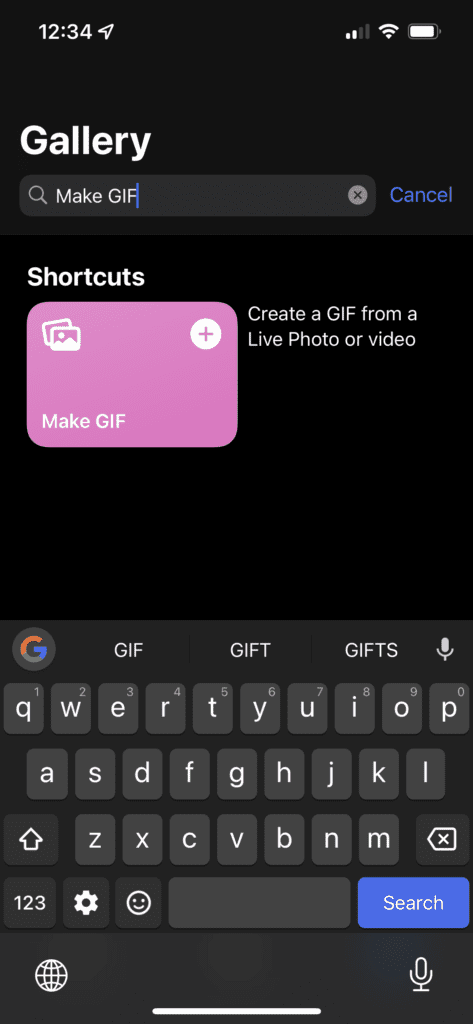
Step 3: Tap on the search bar and search for Make GIF. Alternatively, you can download the Shortcut directly from here.
Step 4: Select the Shortcut that is displayed. You can see a section describing what the Shortcut does and the different ways in which you can run it. Tap on ‘Add Shortcut’ to add it to your library.
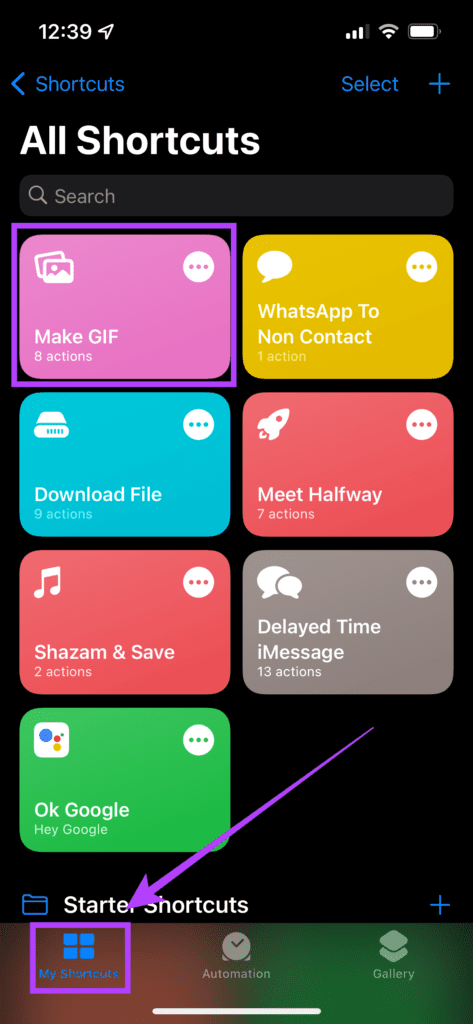
Step 5: Now, go back to the ‘My Shortcuts’ section, and you will see the ‘Make GIF’ shortcut displayed there.
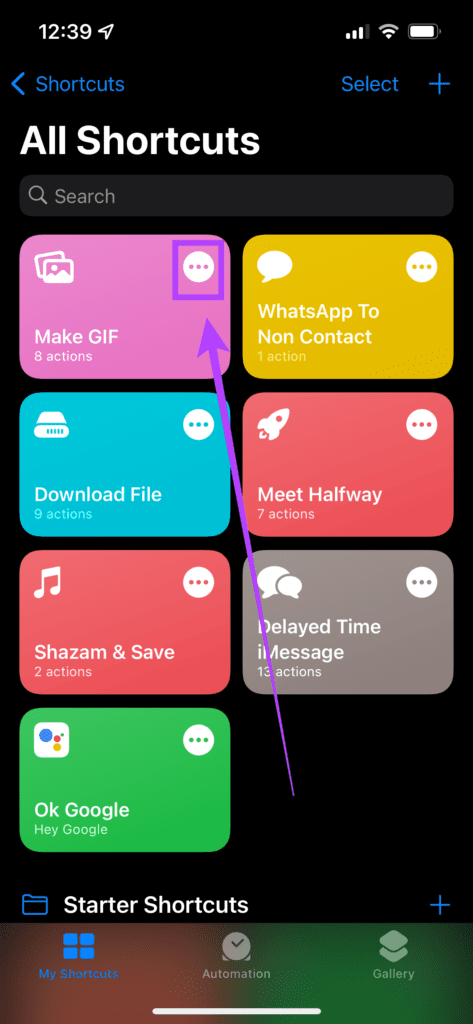
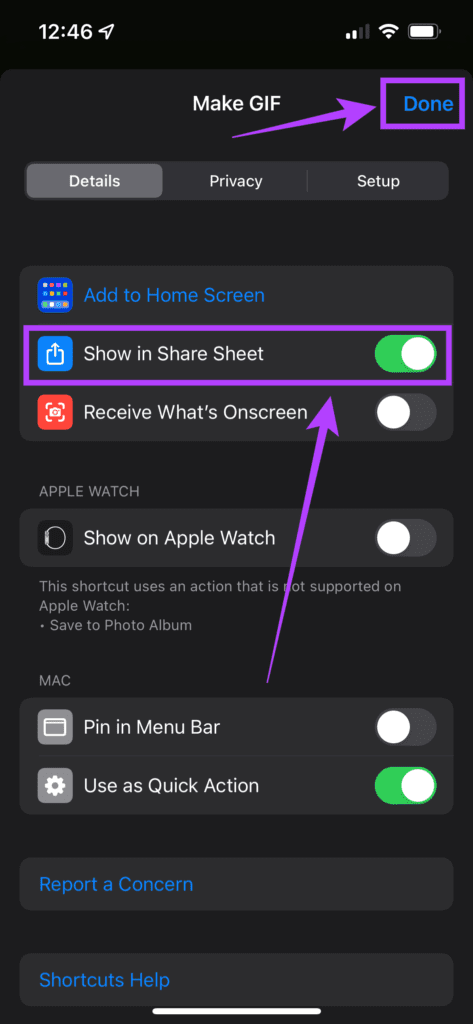
Step 6: Tap on the three dots in the white circle displayed on the ‘Make GIF’ Shortcut. Then, select the blue ‘Settings’ icon on the top-right corner. Step 7: Here, you will see the ‘Show in Share Sheet’ option. Toggle it on and select ‘Done’.
That is it for the setup process. Now that we have the Shortcut set up, let’s see how you can save your live photos as GIFs directly from the Photos app.
How to Convert Live Photos to GIFs on Your iPhone
Step 1: Open the ‘Photos’ app on your iPhone.
Step 2: Navigate to the live photo you want to convert. Step 3: Tap on the ‘Share’ icon on the bottom left corner of the screen.
Step 4: Scroll down and find the ‘Make GIF’ option. Tap on it.
Step 5: Wait for a few seconds for the conversion to occur. Once the live photo is saved as a GIF, you will see a pop-up on the top of the screen. Tap on ‘Done.’
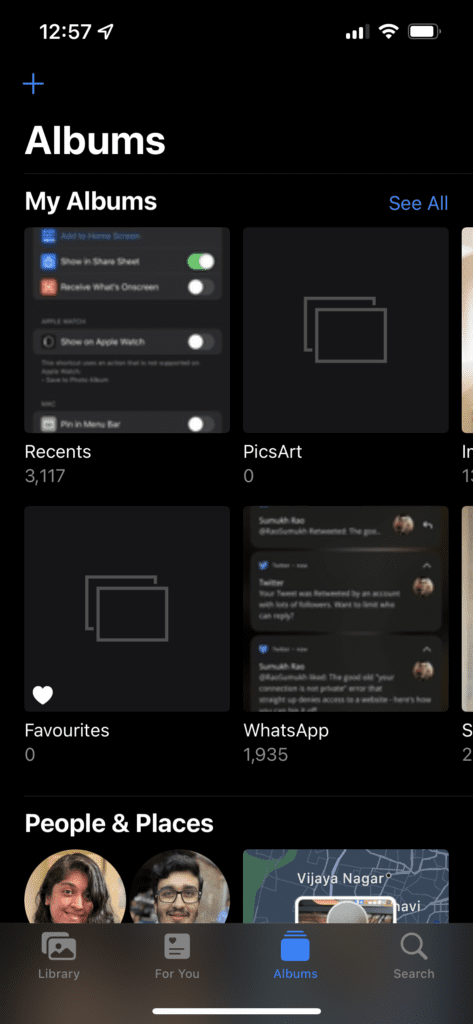
Step 6: Go back to the ‘Recents’ album in the ‘Photos’ app, and you will find your GIF there. Share it with whoever you want, just like how you would share a still image or any form of media. There you go! Saving a live photo as a GIF is now just a button away! Once the Shortcut is set up for the first time, you don’t have to go through that process over and over again. You just have to select the ‘Make GIF’ option in the Photos app, and you will be good to go.
Share Your GIFs Online
Start creating GIFs using your live photos and share them with friends online! GIFs are a fun way to interact, and creating them is simply a touch away now on your iPhone. You can even convert short videos to GIFs using this shortcut, so you can get creative.


