Several factors, ranging from misconfigured settings to faulty drivers, can trigger the ‘No audio device is installed’ error in Windows 11. If you can’t figure out what’s causing the error, try the following troubleshooting tips.
1. Disconnect and Reconnect External Audio Device
When you have problems with an external audio device, you’ll need to check its connection to your computer. For cables, unplug the audio device (like headphones or speaker) and plug it back in. If you’re using a Bluetooth headphones or speaker, unpair it and reconnect it to your computer. If it’s just a minor connection issue, this should do the trick and fix the ‘No audio device is installed’ error.
2. Enable Your Audio Device on Windows
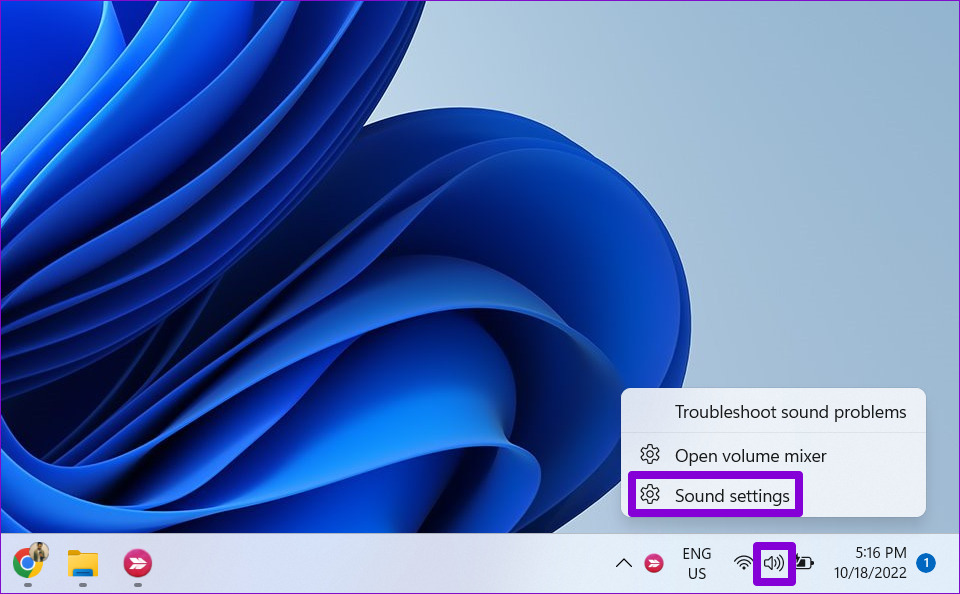
Next, you need to ensure that you haven’t accidentally disabled the audio device on Windows. It can happen if you connect a bunch of headphones, Bluetooth headphones, and speakers with your computer. Here’s how to check and fix that. Step 1: Right-click the speaker icon on the Taskbar in the bottom-right corner and select Sound settings from the menu that appears.
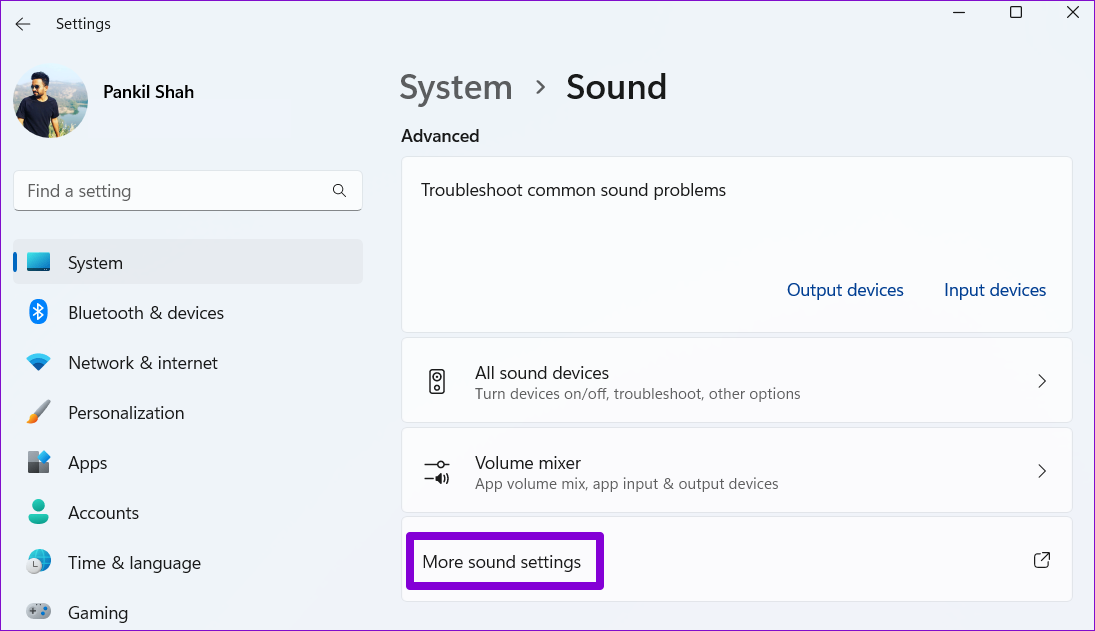
Step 2: In the Settings window, click on Sound from the right pane while being in the System section. Then, scroll down to the Advanced section and click on ‘More sound settings.’
Step 3: Under the Playback tab, locate your audio device that shows disabled. Right-click on it and select Enable.
If your device does not appear on the list, right-click anywhere within the Playback tab and select the ‘Show Disabled Devices’ option. When your device appears, right-click on it and select Enable.
3. Run the Playing Audio Troubleshooter
Windows’ built-in troubleshooters are quite effective when it comes to fixing system-related issues and errors. In this case, you can run the Playing Audio troubleshooter to allow Windows to find and fix any audio-related issues on your computer. Step 1: Click on the Start menu and click the gear icon to launch the Settings app.
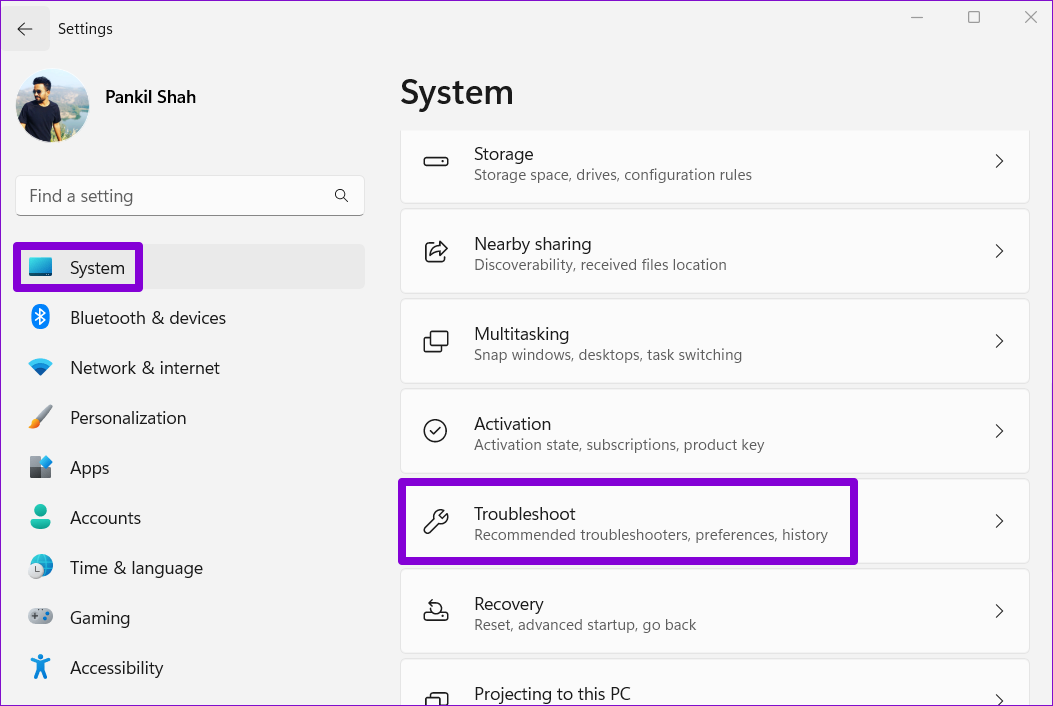
Step 2: In the System tab, click Troubleshoot.
Step 3: Select Other troubleshooters.
Step 4: Click the Run button next to Playing Audio.
Wait for the troubleshooter to fix any issues with your system and the error should not bother you after that.
4. Check Audio Services
For audio to work on your computer, Windows relies on two system services: Windows Audio and Windows Audio Endpoint Builder. If one of these services is not running for some reason, you may experience audio problems on Windows 11. Here’s what you can do to fix them. Step 1: Press the Windows key + R shortcut to open the Run dialog box. Type services in the box and press Enter.
Step 2: In the Services window, scroll all the way down to locate Windows Audio on the list. Double-click on it to open its properties.
Step 3: Change the startup type to Automatic and click Apply followed by OK.
Repeat the above process to configure the startup type for the ‘Windows Audio Endpoint Builder’ service too. Then, restart your PC and see if Windows detects your audio device.
5. Update or Reinstall Audio Driver
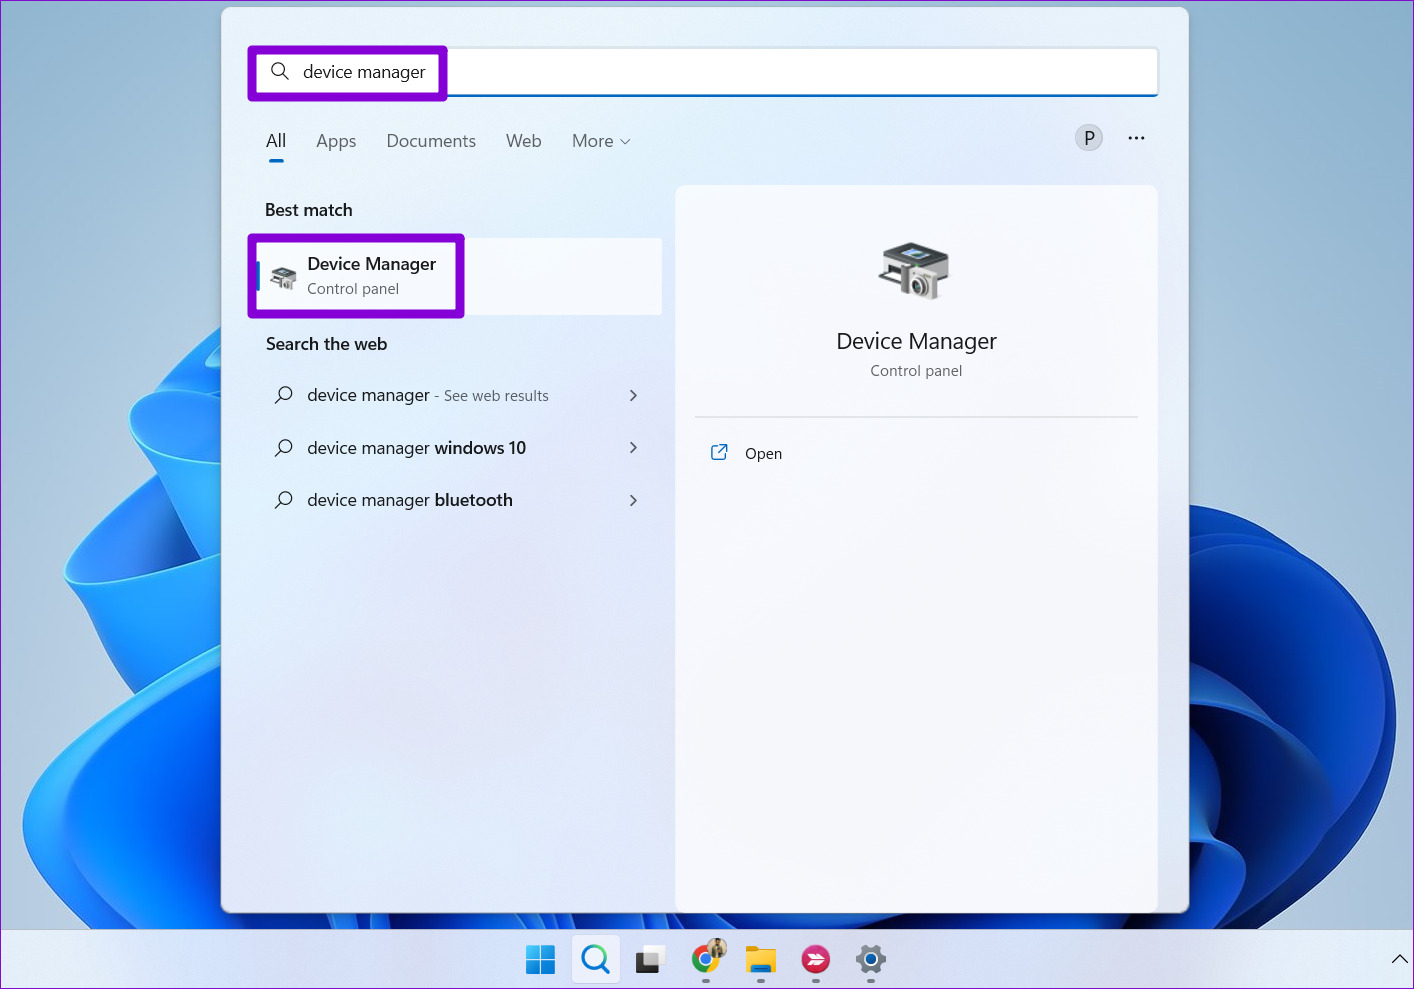
A faulty audio driver could prevent Windows from communicating with your device and trigger the ‘No audio device is installed’ error. Most of the time, you can resolve such issues by simply updating the audio driver. Here’s how you can go about it. Step 1: Press the Windows key + S shortcut to open the Windows Search menu. Step 2: Type device manager in the search box and select the first result that appears.
Step 3: Expand ‘Sound, video and game controllers.’ Then, right-click on the audio device, and select Update driver from the list.
Follow the on-screen instructions to finish updating the driver. If updating the driver does not help, uninstall the problematic driver and restart your computer. Windows will automatically install the missing audio driver after the windows boots to fix the error.
6. Perform a System Restore
Such an error can also appear if your PC has undergone any bad system changes. If none of the above solutions work, you can use System Restore to undo recent changes and revert your PC to a point before the error first appeared. Step 1: Open the search menu, type in create a restore point, and press Enter.
Step 2: In the System Properties window, click the System Restore button.
Step 3: Click Next.
Step 4: Select the restore point before the error first appeared.
Step 5: Lastly, click on Finish.
Your PC will reboot and revert to the specified restore point. After that, the error should not appear on Windows.
It’s All About the Sound
Although Windows does a good job of detecting available audio devices on its own, it can occasionally fail and display the ‘No audio device is installed’ error. And it’s only natural to be concerned when that happens. Hopefully, one of the above solutions has helped you fix the error and you’re at peace.
